Page 3 of 4
8. Printing and assembling the MeteoStation printable hardware
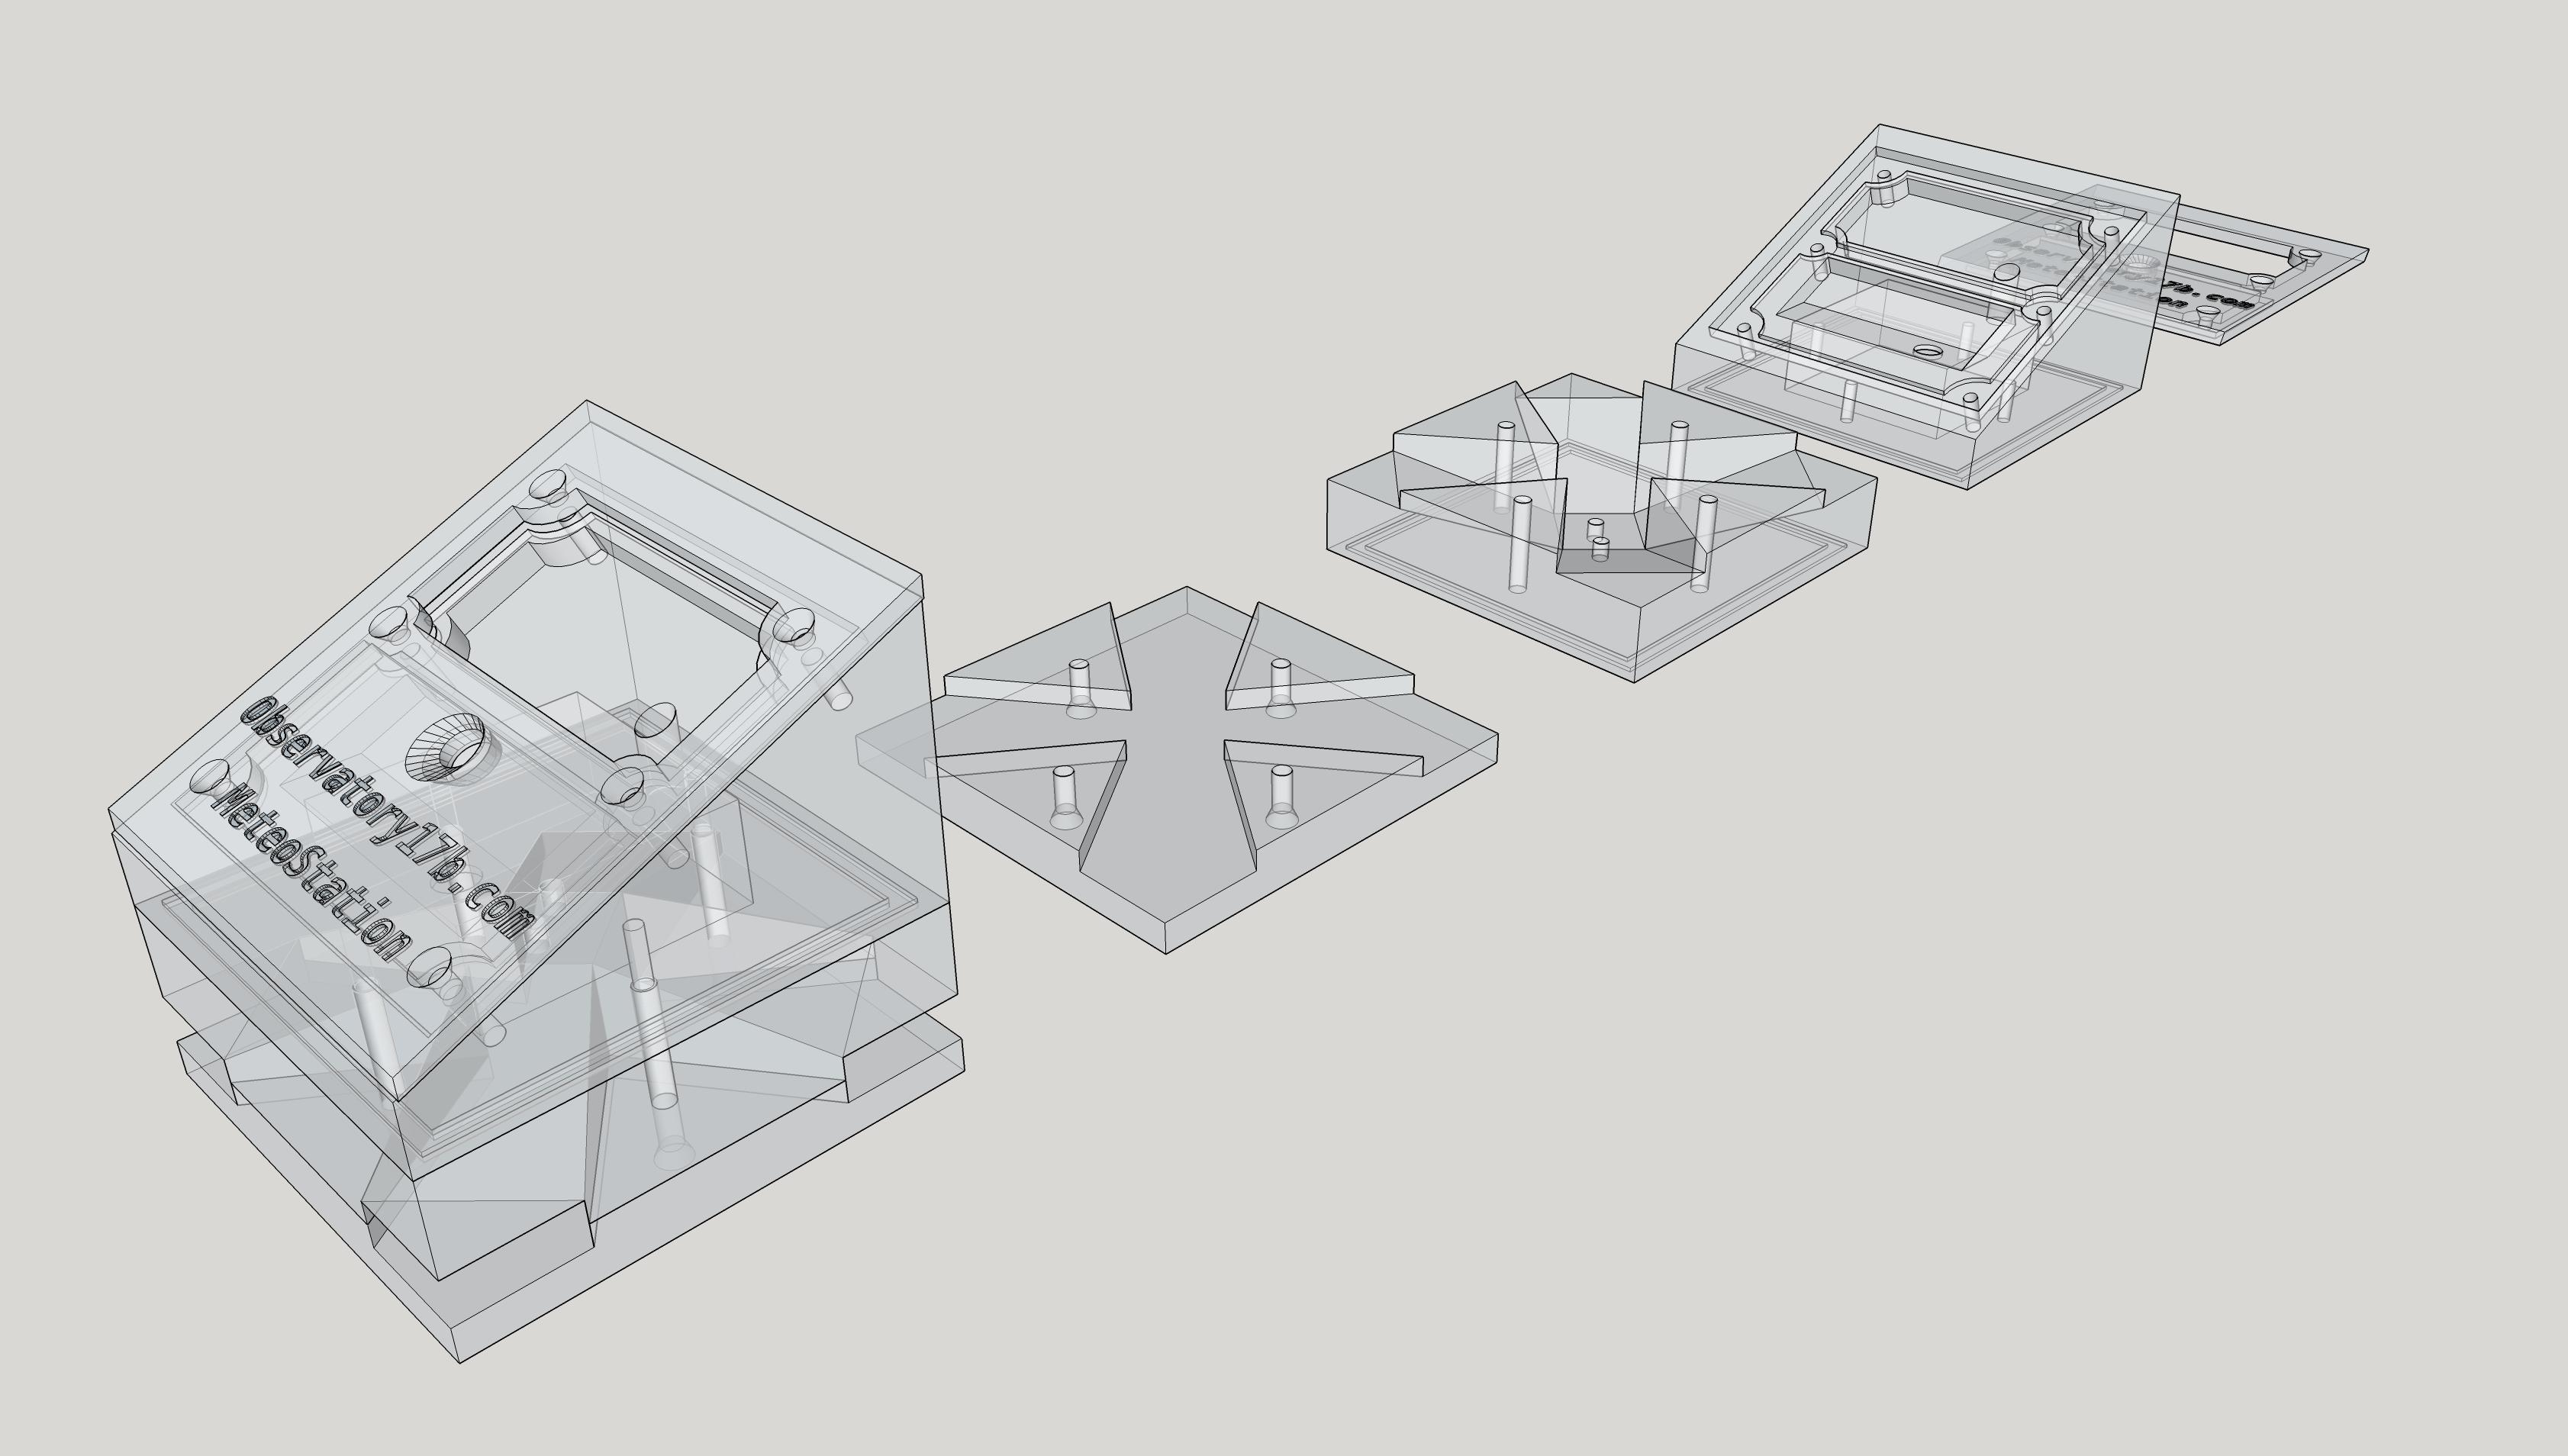
Download the 3d printable MeteoStation on thingiverse hints on prnt settings is in the thingiverse project. Adjust for your printer / filament
If you do not have a 3d printer, you can get the parts printet trough a service like 3D Hubs.
Sumirizing the build steps.
- You need approximately 125m of PETG, 2.65m of TPU and 1.25m of PLA to print this housing.
- Where there are several versions for one part, allways print the one with highest version number.
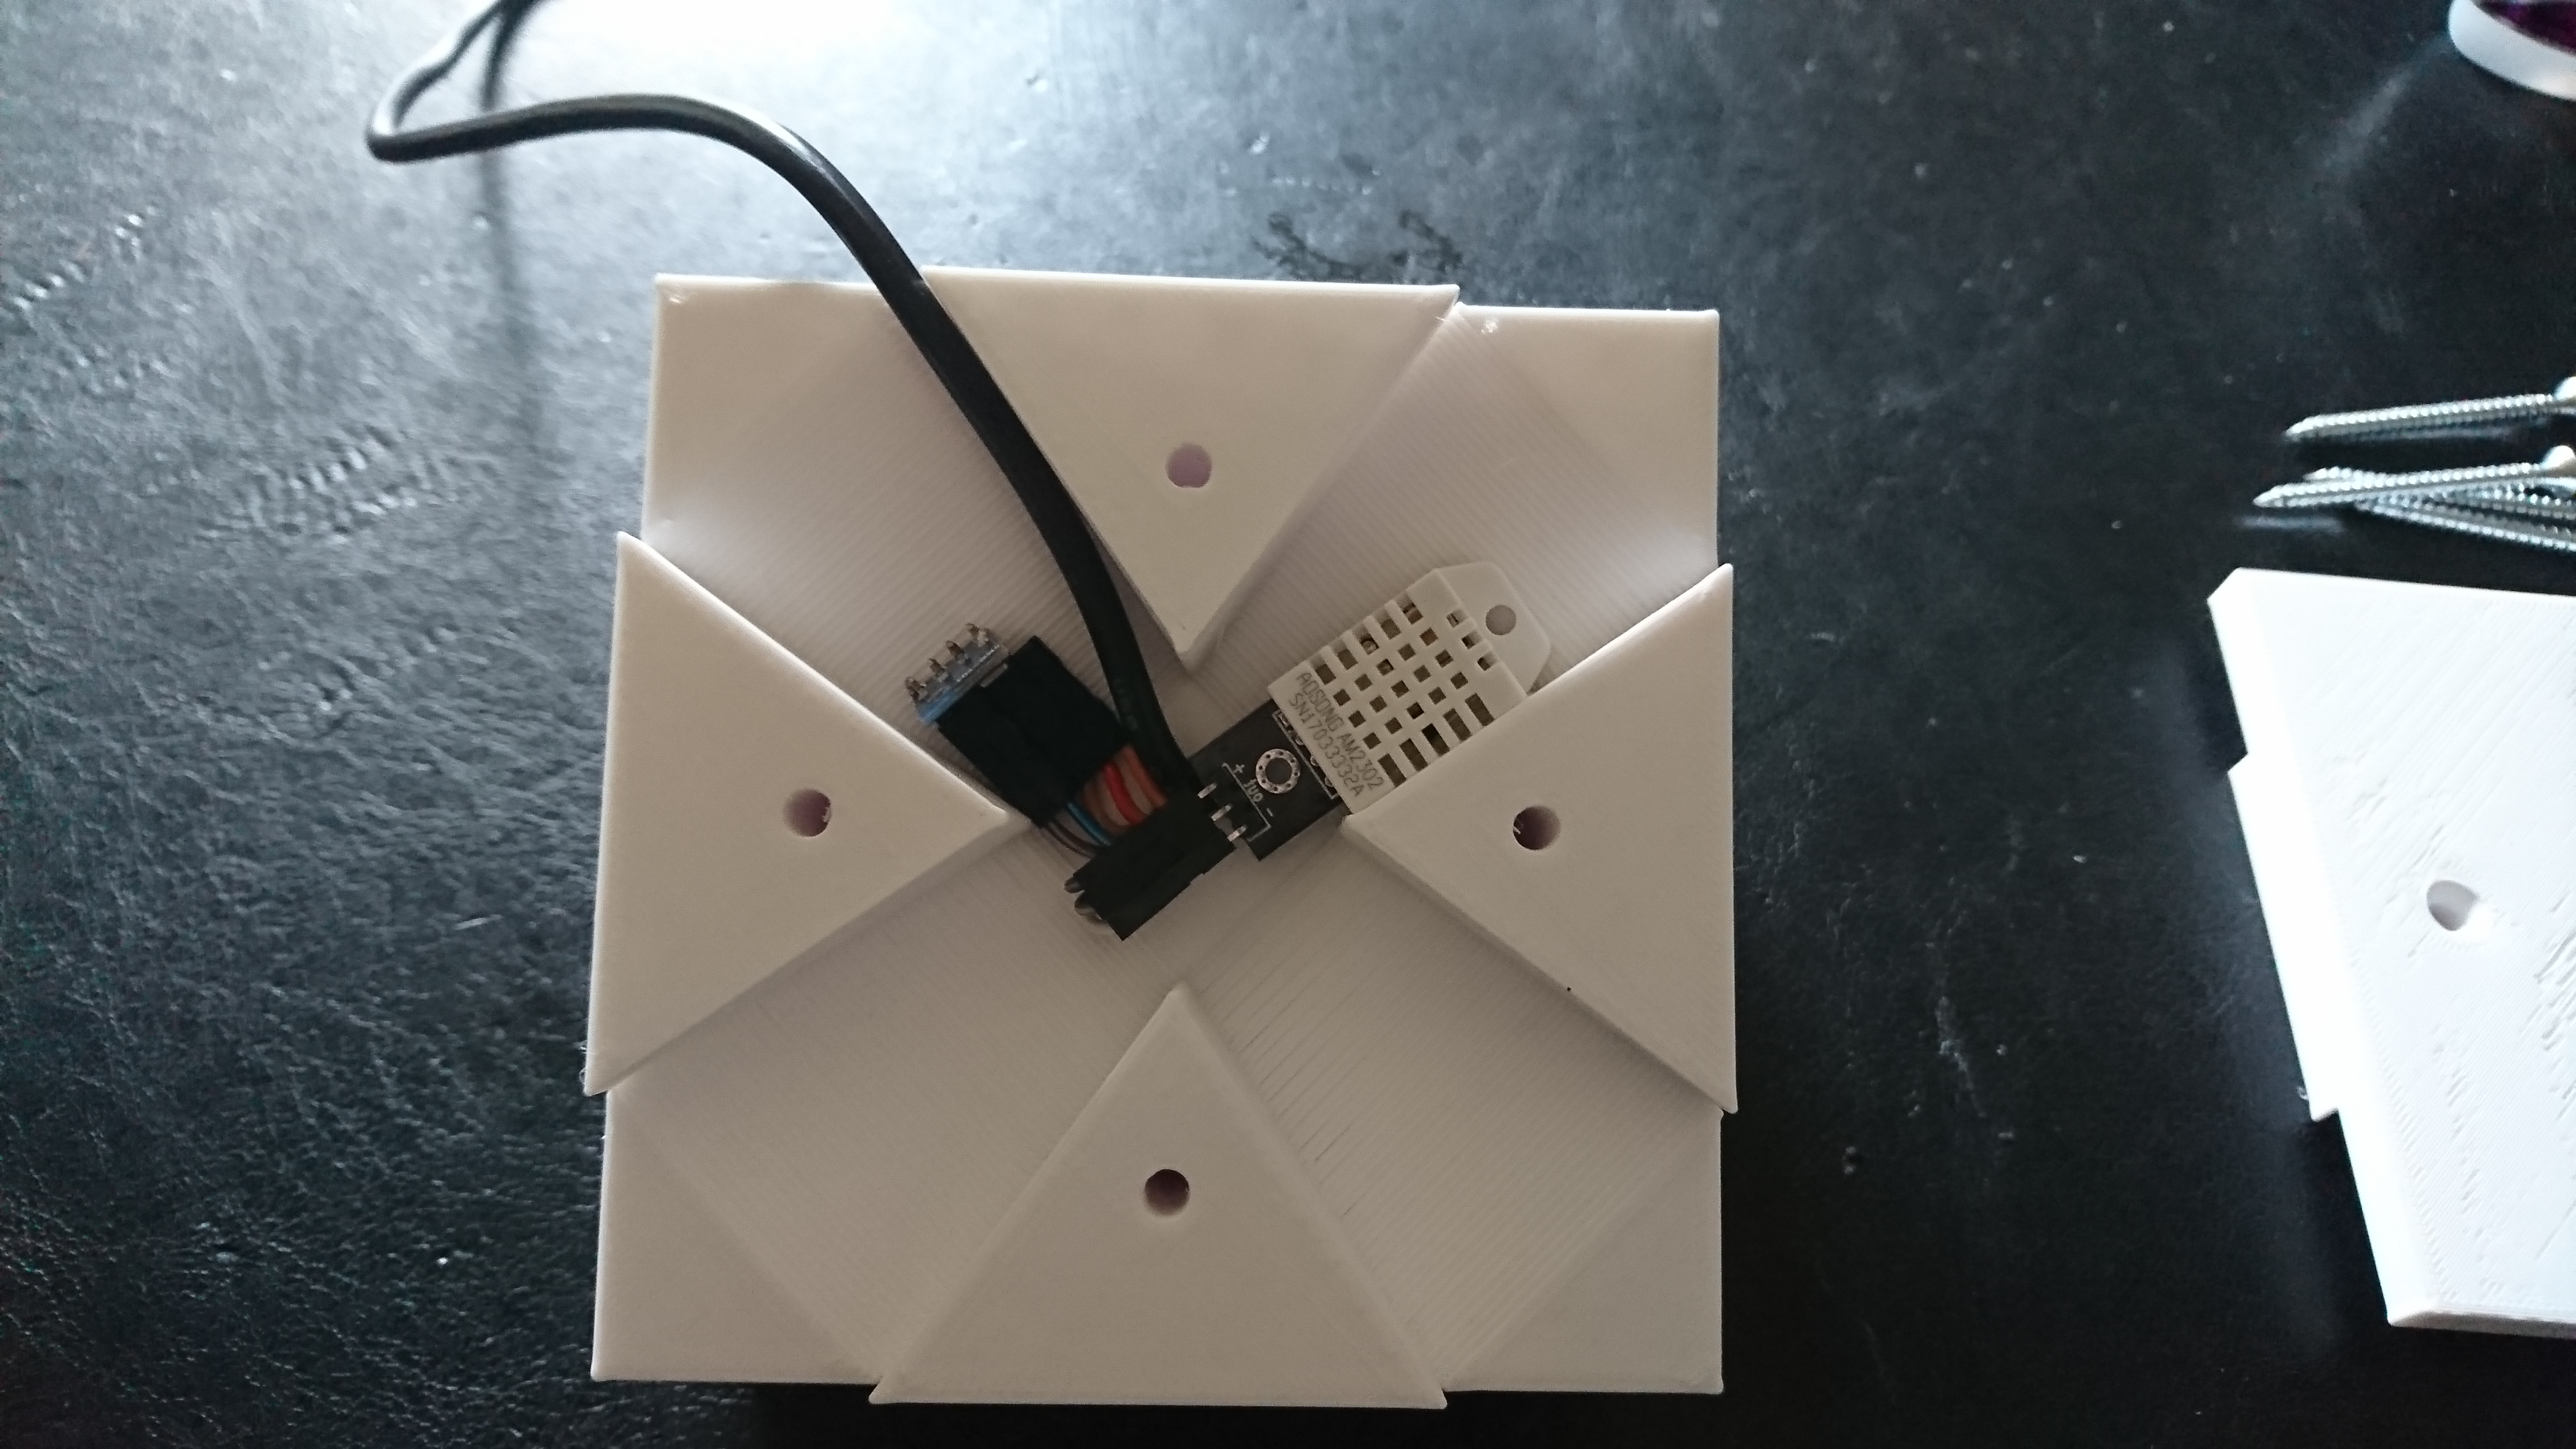
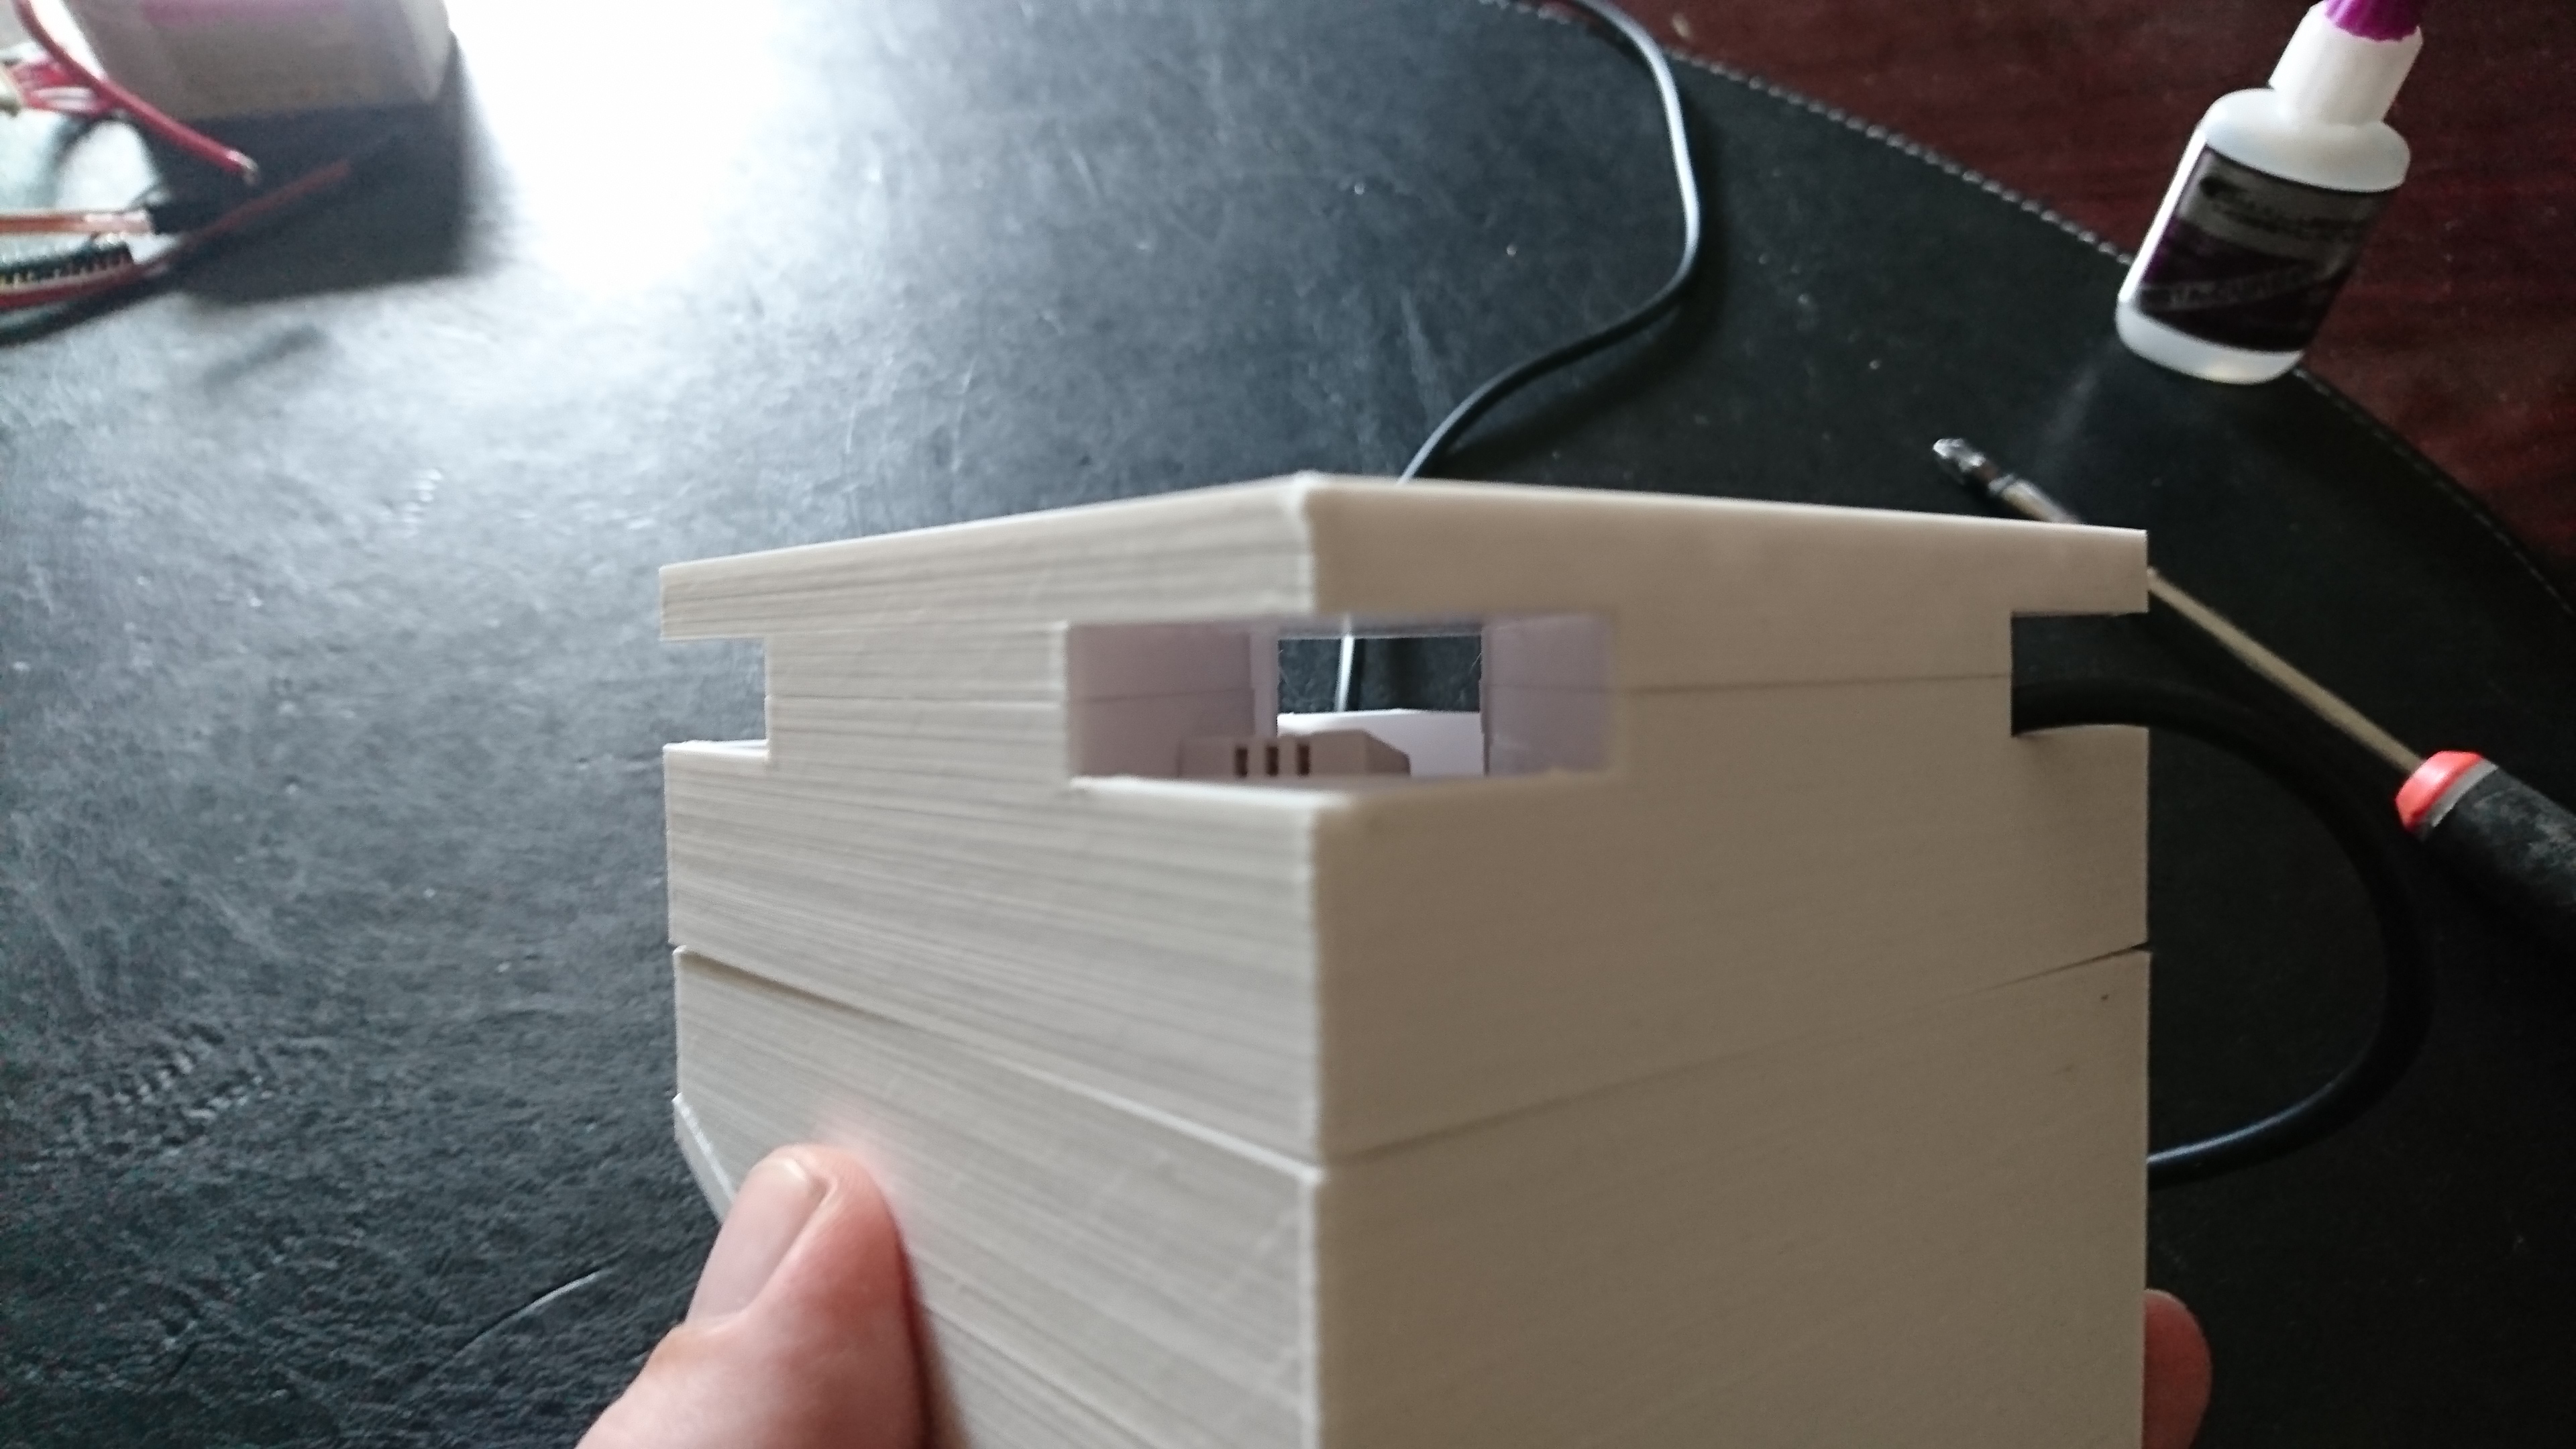
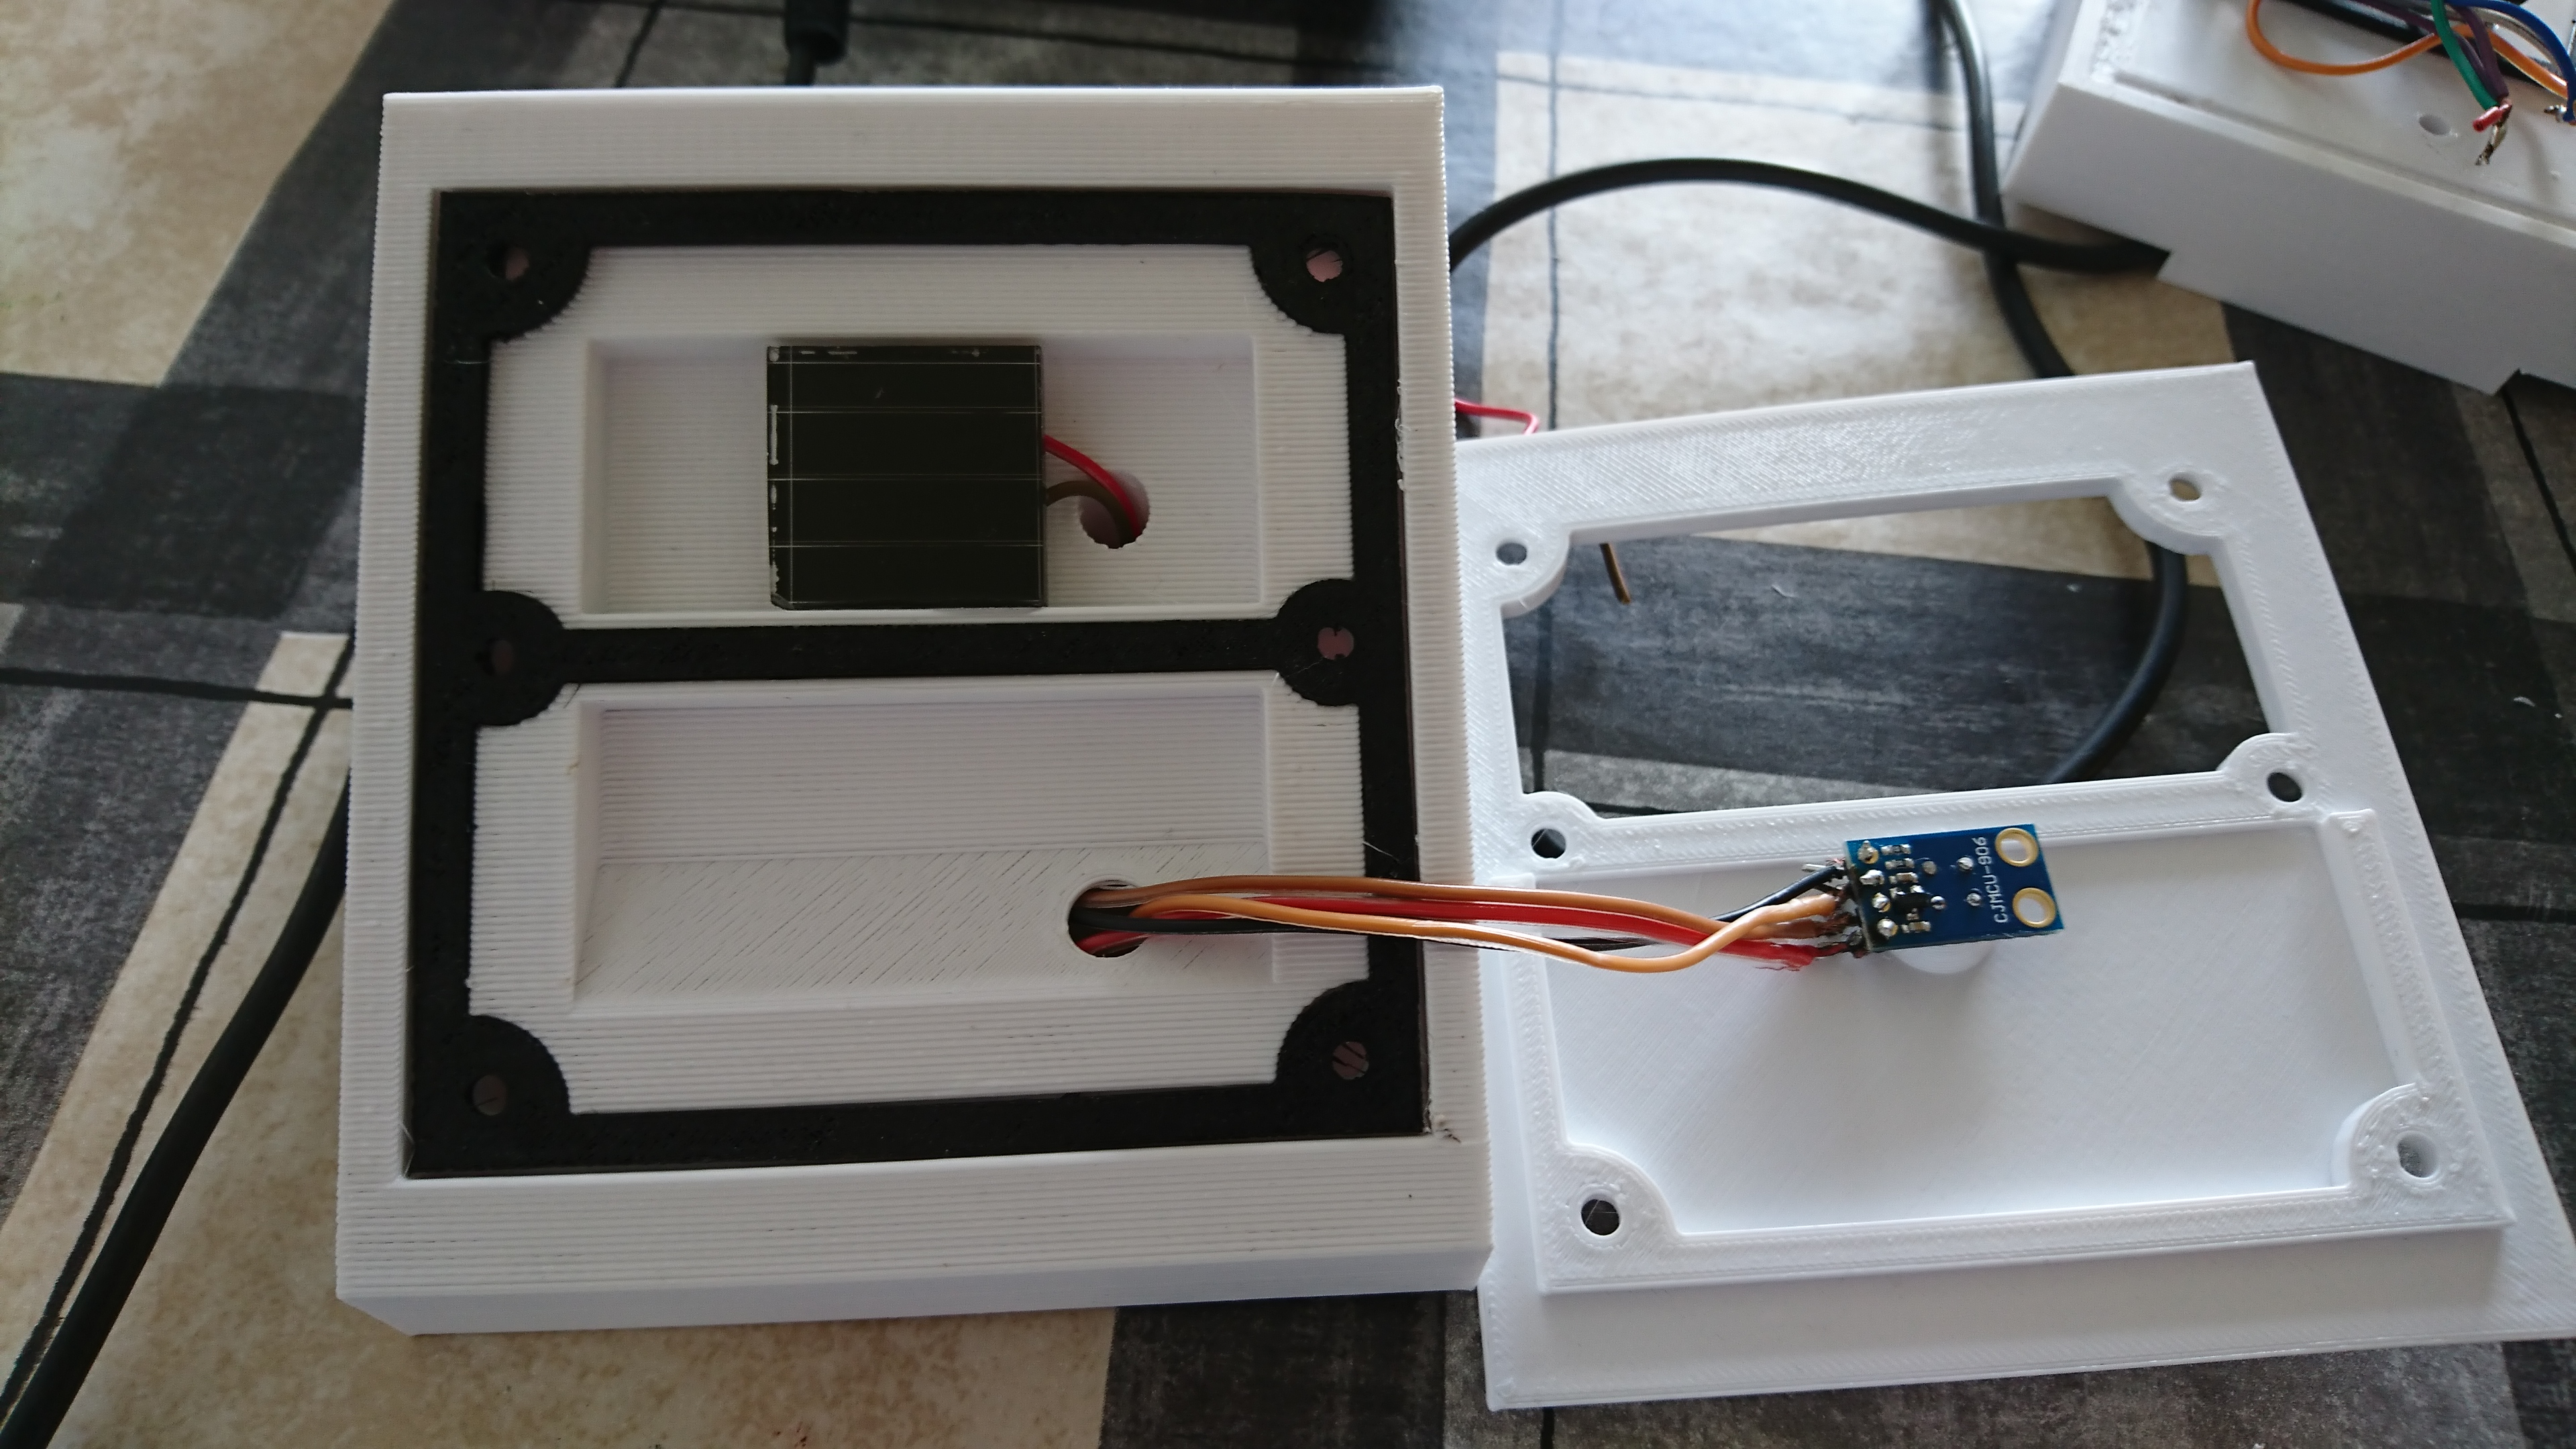
- Use pictures as assembly guide. (More pictures on thingiverse)
- Sensors for temperature and humidity goes in the ‘wind tunnel’ betwean the bottom and middle part.
- IR Radiance sensor mounts under the acryllic glass, and the IR sensor in the opening of the top part.
- You need 2mm thick 9x5 cm acryllic perspex glass, that can be worked on with wood tools.
- Use the part MeteoStation-windowTemplate printed in PLA as a guide to cut the glass to size, and cut holes.
Screws used are all countersunk, and here is 4x 4x50mm + 6x 4x15mm
Finished product is close to 10 cm^3