INDI Library v2.0.7 is Released (01 Apr 2024)
Bi-monthly release with minor bug fixes and improvements
INDI focuser driver for Waveshare Stepper Motor HAT for Raspberry Pi / Rock Pi
- Kevin Ross
-
 Topic Author
- Offline
- Elite Member
-

- Posts: 421
- Thank you received: 102
Replied by Kevin Ross on topic INDI focuser driver for Waveshare Stepper Motor HAT for Raspberry Pi
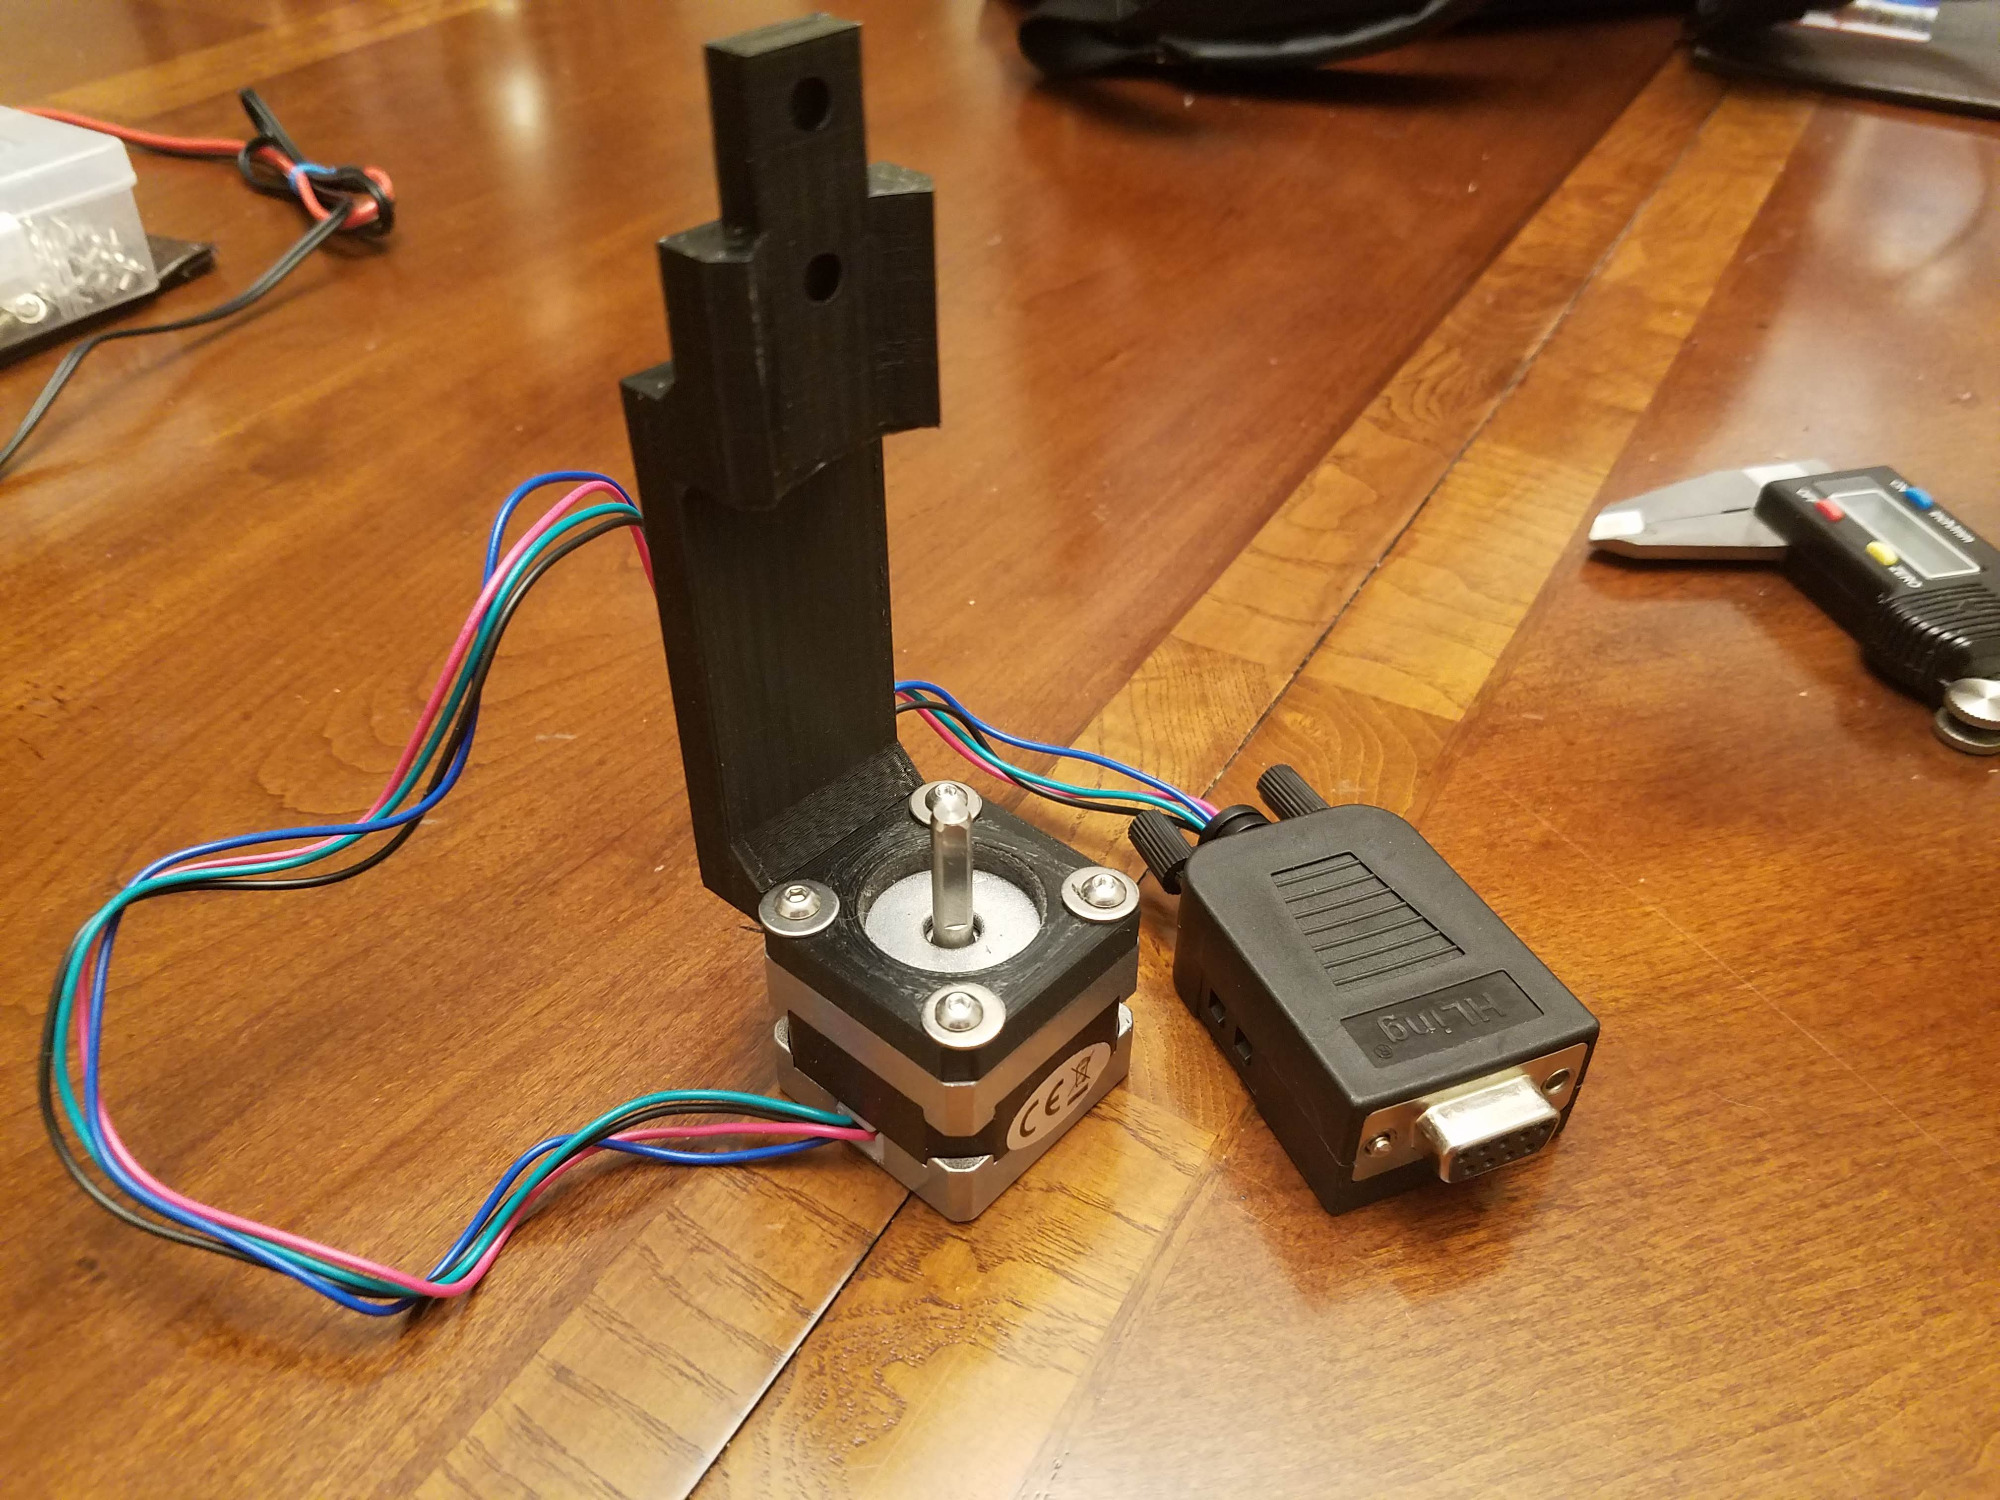
That Raspberry Pi case is no longer used, I replaced it with a custom 3D printed one, I just haven't taken any photos of it yet.
I used a DB9 connector because that's what my Moonlite focuser on my other scope uses. My Waveshare driver controls the Moonlite as well as my DIY focuser. I wired it to match the Moonlite, of course.
Please Log in or Create an account to join the conversation.
- Kevin Ross
-
Topic Author
- Offline
- Elite Member
-
- Posts: 421
- Thank you received: 102
Replied by Kevin Ross on topic INDI focuser driver for Waveshare Stepper Motor HAT for Raspberry Pi
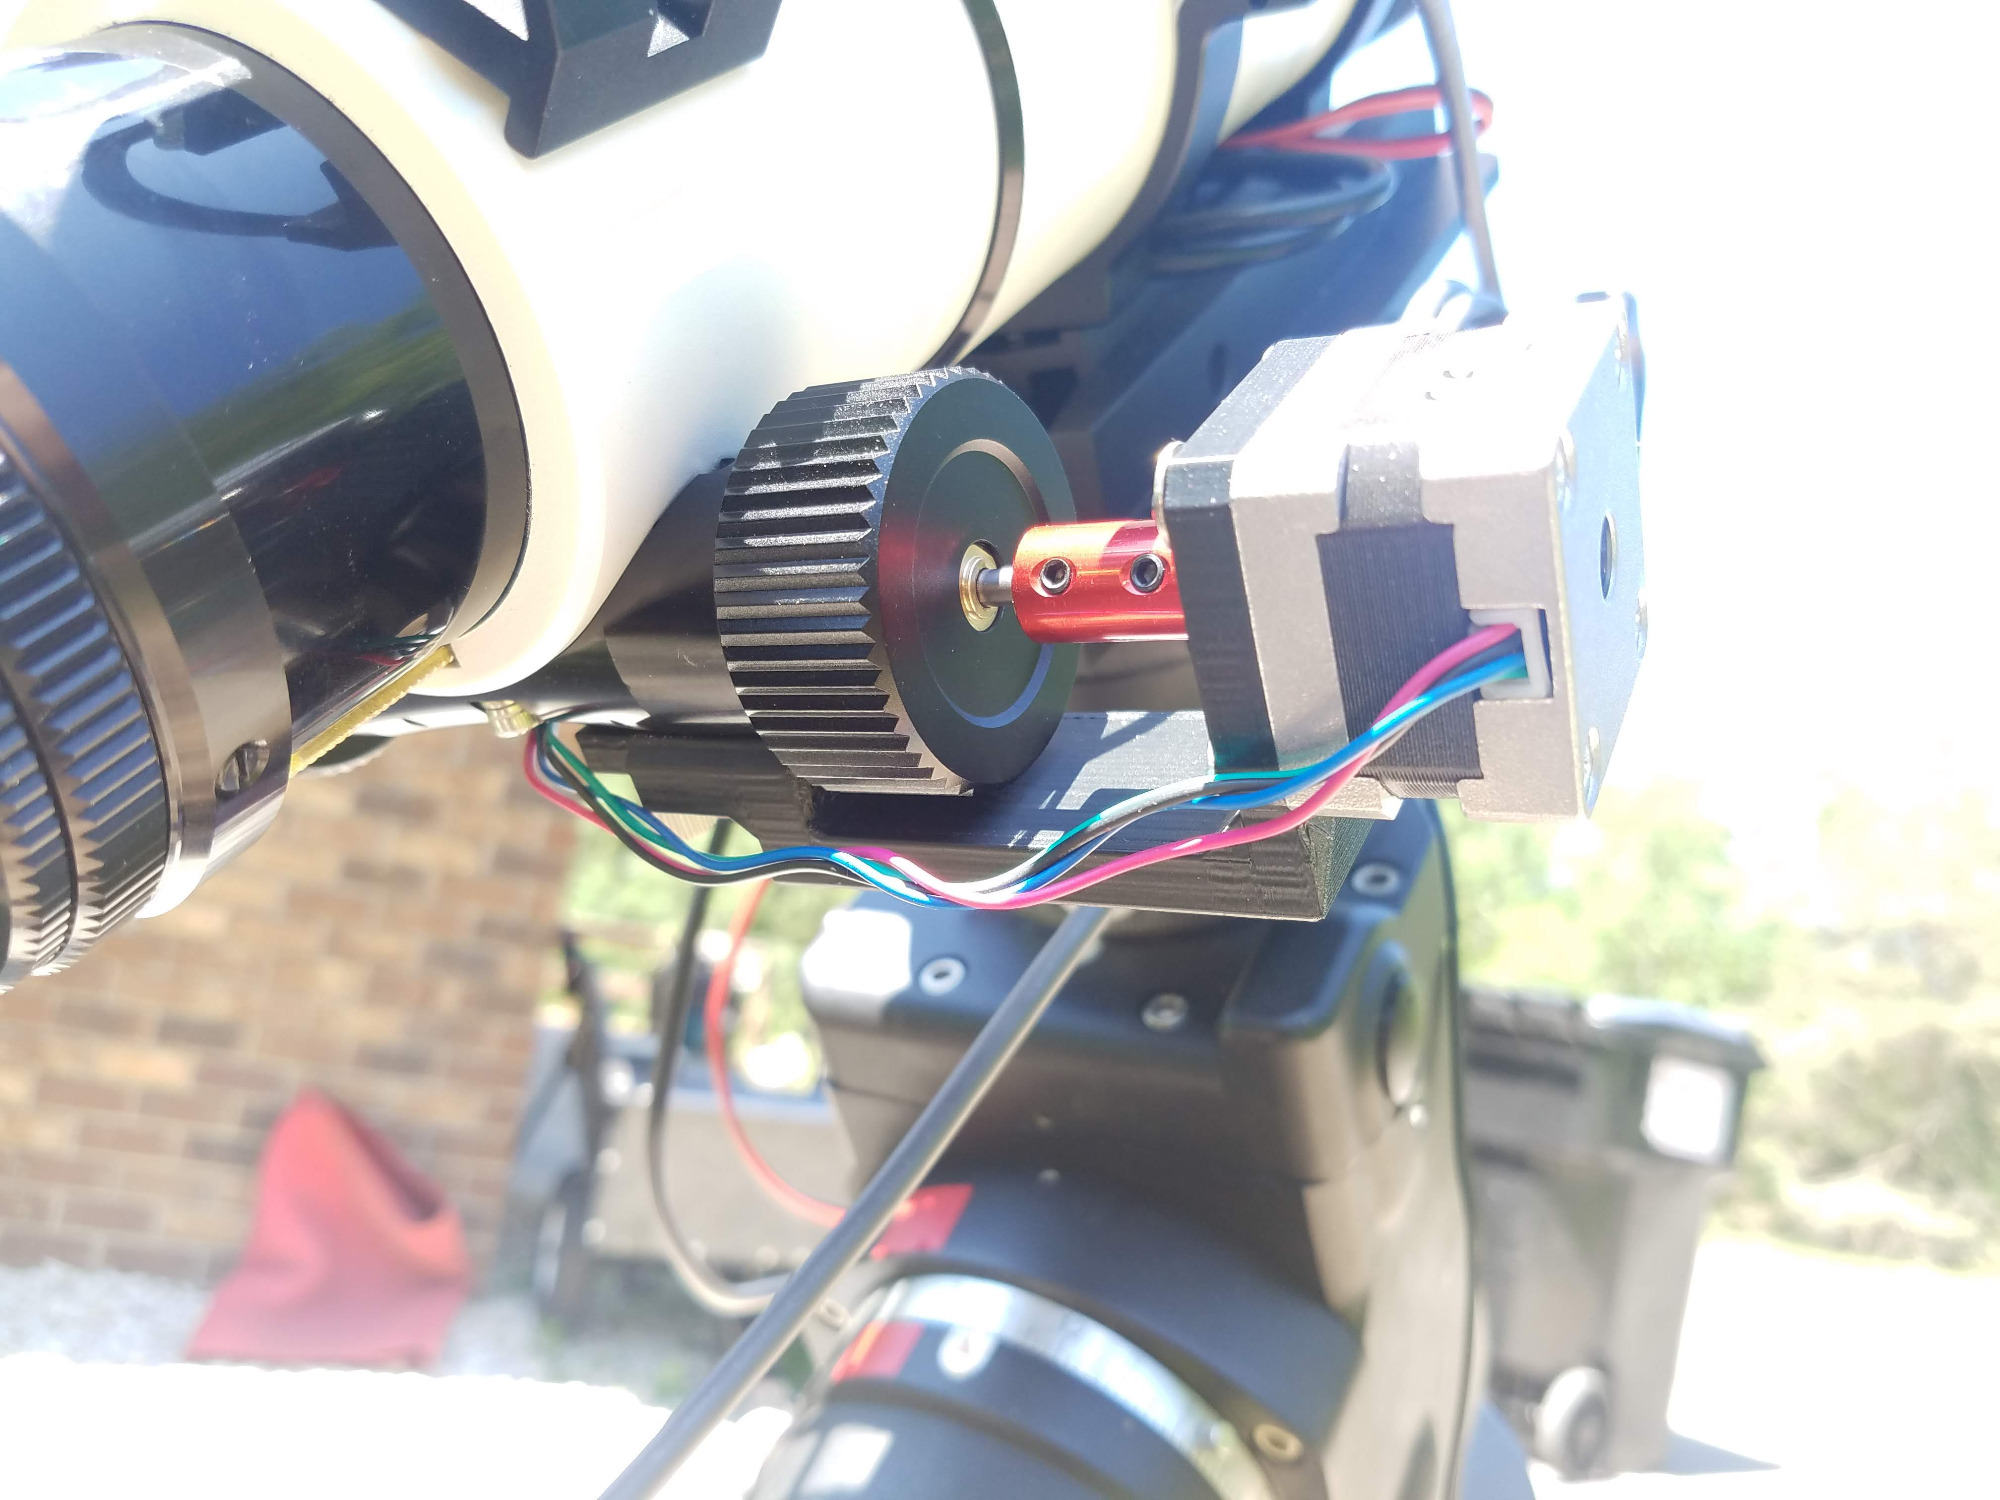
Wow, beautiful setup! Love all the red! And your custom mounting solution is super clean. Love it!
And yeah, the Waveshare HAT has overheat protection built it. You are probably right that it overheated and shut down. If you plan on keeping the motor powered full time, you'll have to adjust the current limit. It isn't terribly obvious how to do it. You will need a multimeter and a tiny screwdriver.
Please Log in or Create an account to join the conversation.
- Jon Carleton
-

- Offline
- Elite Member
-
- Posts: 215
- Thank you received: 16
Replied by Jon Carleton on topic INDI focuser driver for Waveshare Stepper Motor HAT for Raspberry Pi
")
Please Log in or Create an account to join the conversation.
- Eric Brown
-

- Offline
- Senior Member
-

- Posts: 59
- Thank you received: 3
Replied by Eric Brown on topic INDI focuser driver for Waveshare Stepper Motor HAT for Raspberry Pi
.Next is a sidecar clip/mount for the SSD and some additional clips/hooks for cable management. I also need to make some short power cables. Now that I've got the main designs done I can size the cables appropriately. I also need to shorten the stepper cable. I wish I had ordered some connectors before Amazon got overloaded and deprioritized the non-essentials. I'll have to go through Digikey or somebody else like that.
I think I'm going to try to keep to full steps for the focuser operation. That will have multiple benefits. If needed, I can adjust the current limit, though if I'm hitting the limit I may have other issues as well.
I really love the Waveshare stepper hat though. I'm very happy I have been able to get rid of the voltage converter I was using to go from 12v in the PPB to 5v for the rPi4.
There is a benefit to the cloudy skies I've been having. I've been able to pace myself better with this project and avoid the sense of urgency to GET IT DONE NOW... THE SKIES ARE GOING TO BE CLEAR TONIGHT. The downside is plenty of time for 3d model revisions == running out of the black PETG I wanted to print everything with.
Please Log in or Create an account to join the conversation.
- Jon Carleton
-
- Offline
- Elite Member
-
- Posts: 215
- Thank you received: 16
Replied by Jon Carleton on topic INDI focuser driver for Waveshare Stepper Motor HAT for Raspberry Pi
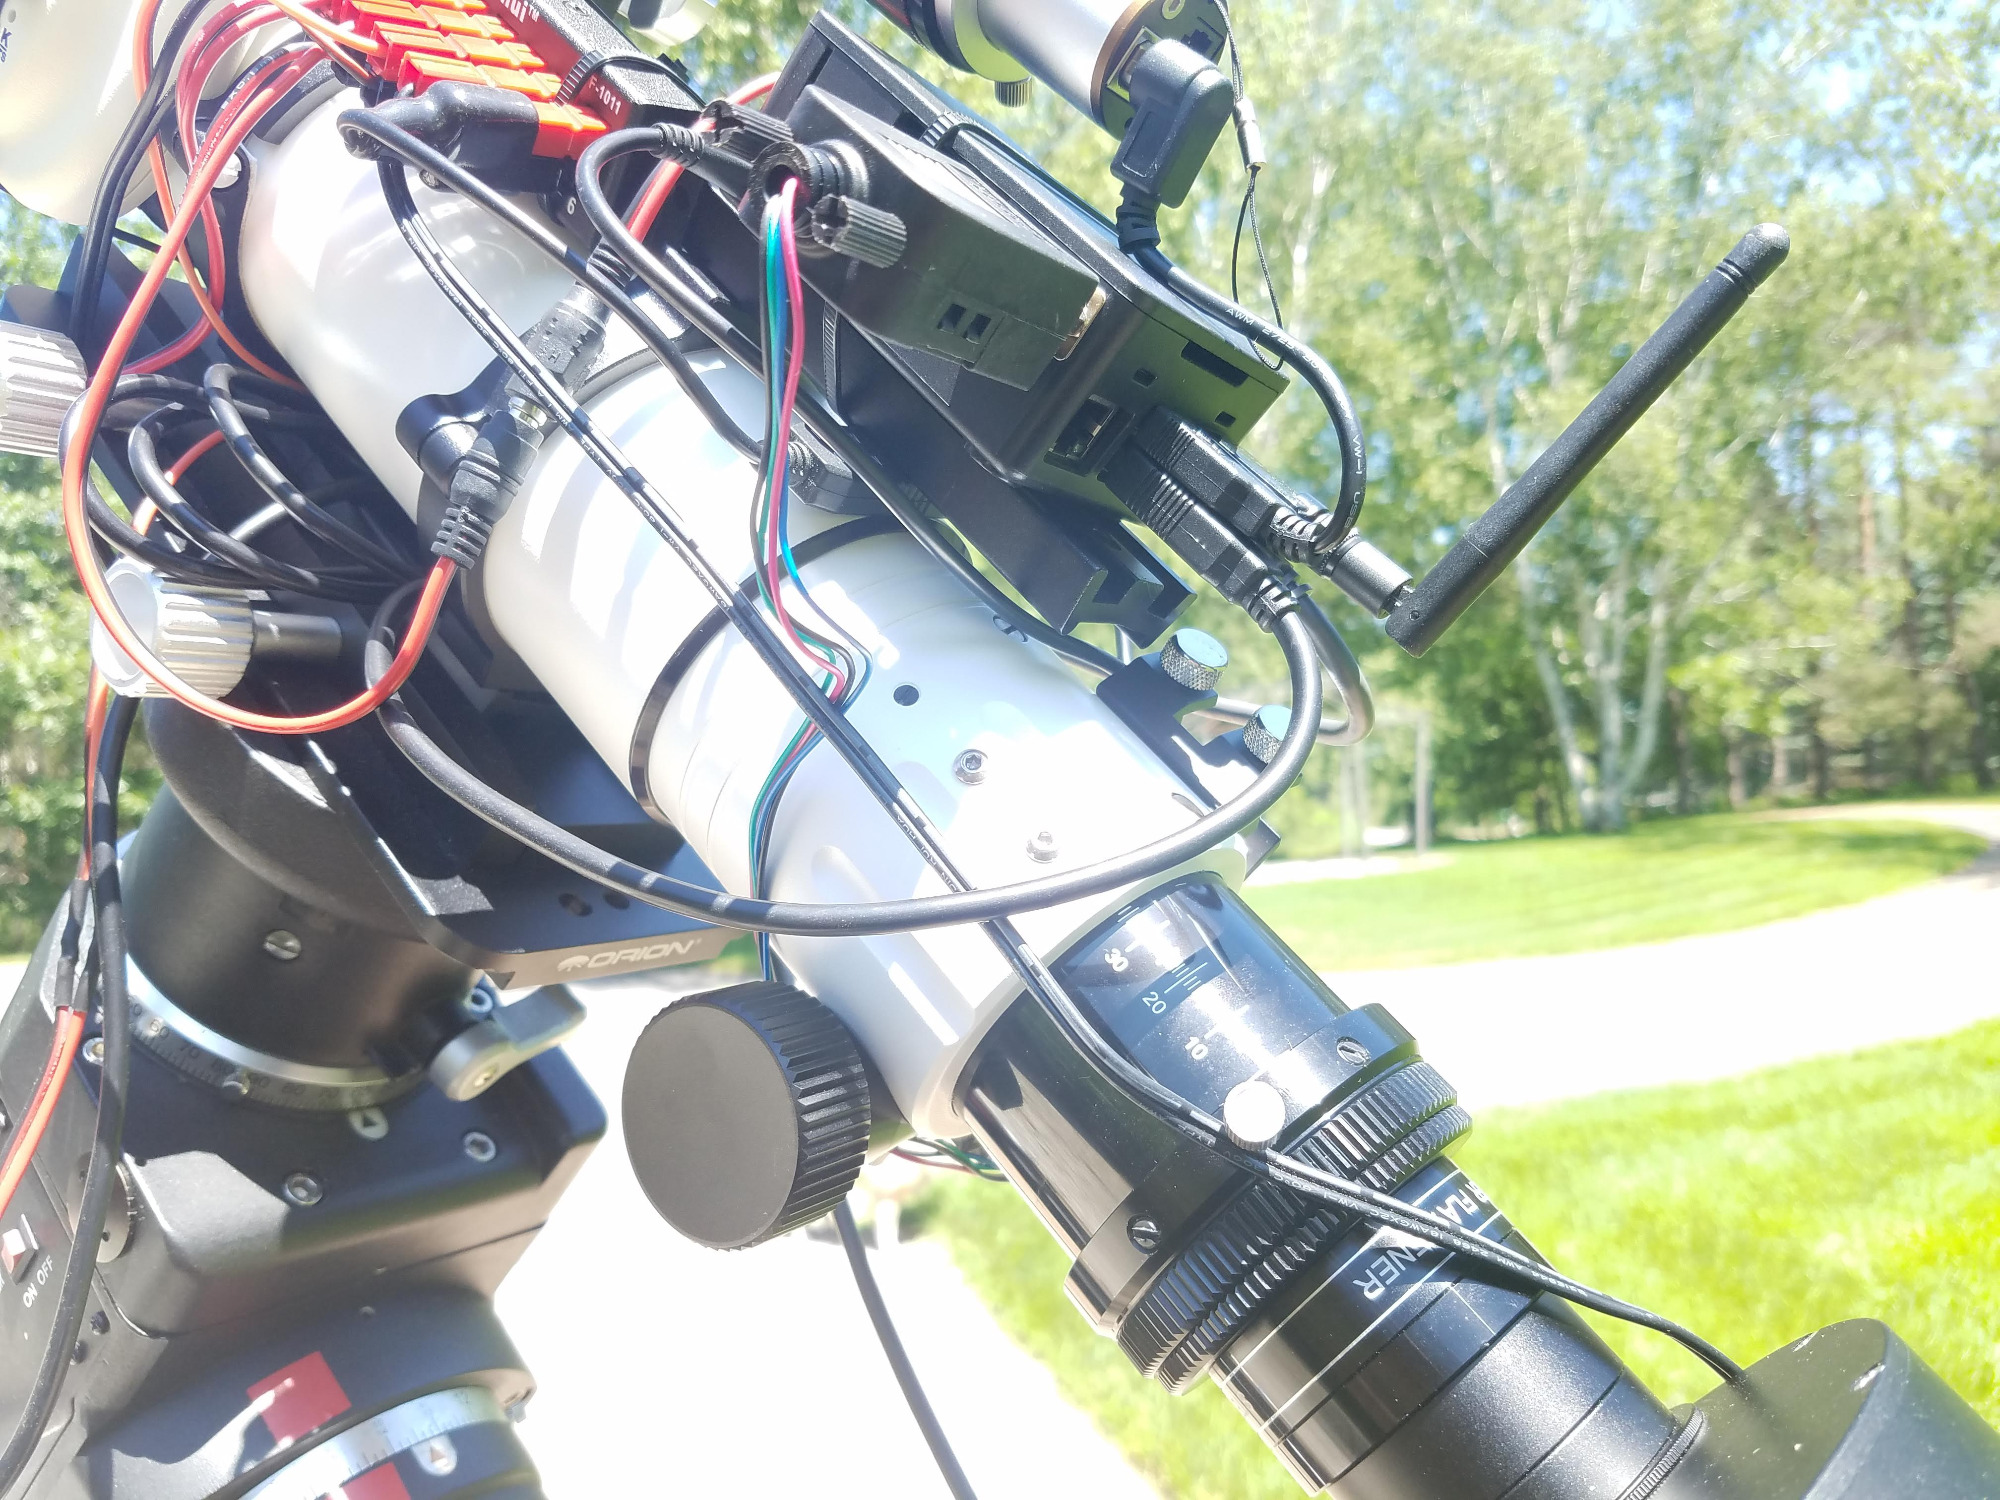
Yes, wire management/reduction is an ongoing problem. I think I've redone my wiring 4 or 5 times since January, when I got the scope. Yours looks good so far! I agree on the design of the WaveShare HAT. I was able to lose ome more wall-wart in the process and am currently down to only 3. One for the Pi/Hat, One for the SynScan/Motors and one for a powered USB hub. I may be able to cut that down to one soon if I can find just the right LED power supply to replace all the wall-wart transformers.
KROSS:
I am jealous of your 3D-ism. I am still old-school, traditional mill, lathe, cutters and fiddly bits. I get the job done, but it takes time. I did save time on the Pi case, however. I found this case made from pieces of cut-out lexan with a nice little fan. So, since they are just layers of cut-outs, I bought 2 and tossed out the extra top and bottom, used longer screws to hold the stack together and presto! A double-tall Pi case with fan. I believe I paid $12.00 for the two cases on eBay.
Please Log in or Create an account to join the conversation.
- Kevin Ross
-
Topic Author
- Offline
- Elite Member
-
- Posts: 421
- Thank you received: 102
Replied by Kevin Ross on topic INDI focuser driver for Waveshare Stepper Motor HAT for Raspberry Pi
I come from a family of machinists, so I can relate! I myself have a 12x36 lathe out in the garage. No mill yet. 3D printing can be fun, but it can also be a huge time sink. But as a machinist, you would find the lack of precision in the mechanics of hobby-grade 3D printers would drive you nuts.
Please Log in or Create an account to join the conversation.
- Kevin Ross
-
Topic Author
- Offline
- Elite Member
-
- Posts: 421
- Thank you received: 102
Replied by Kevin Ross on topic INDI focuser driver for Waveshare Stepper Motor HAT for Raspberry Pi
Ah yes, my scope would look neat, too, if I removed all the cables.
May I ask what stepper motor you are using? I actually went for a .9 degree stepper instead of the more usual 1.8 degree, which gives twice the resolution.
And yes, good call on using PETG. PLA doesn't really do all that well when left outside, especially in the sun.
Please Log in or Create an account to join the conversation.
- Eric Brown
-
- Offline
- Senior Member
-
- Posts: 59
- Thank you received: 3
Replied by Eric Brown on topic INDI focuser driver for Waveshare Stepper Motor HAT for Raspberry Pi
While researching I came upon another option that seems like it might work much better for my use. I found steppers with built-in gearboxes. Specifically, I found a model with a 5.18:1 ratio. That will increase torque (to 2N-m) and decrease the step size to .35 degrees / step. If it ends up too slow, I can decrease the micro stepping ratio. I've ordered one, so I'll see how it works.
As for PETG, I have conflicting requirements. The base / stepper mount needs to be as stiff as possible (and not deform over time while under strain), but it also is going to be outside and very likely may spend time in the sun. So far PETG seems to be working, but we'll see if it holds up over time.
For the base, I definitely could have used a mill and metalworking skills. Its not much more than a flat bar with a couple of slots milled into it to adjust tension (plus the stepper mount). If the 3d printed version fails over time, I'll have to pursue a metal version.
Please Log in or Create an account to join the conversation.
- Kevin Ross
-
Topic Author
- Offline
- Elite Member
-
- Posts: 421
- Thank you received: 102
Replied by Kevin Ross on topic INDI focuser driver for Waveshare Stepper Motor HAT for Raspberry Pi
I'm thinking that using millisecond resolution for the delay between steps is too much. I think adding even just 1 ms per step is not fine enough. I'm thinking I should change it to microsecond resolution.
Please Log in or Create an account to join the conversation.
- Eric Brown
-
- Offline
- Senior Member
-
- Posts: 59
- Thank you received: 3
Replied by Eric Brown on topic INDI focuser driver for Waveshare Stepper Motor HAT for Raspberry Pi
Smaller resolution for the delay would probably be a good idea. I wonder if it would be helpful to add a delay between enabling the motor and starting the stepping.
Please Log in or Create an account to join the conversation.
- Kevin Ross
-
Topic Author
- Offline
- Elite Member
-
- Posts: 421
- Thank you received: 102
Replied by Kevin Ross on topic INDI focuser driver for Waveshare Stepper Motor HAT for Raspberry Pi
Just go to the source folder, and:
git pull
cd build
make
sudo make install
And restart your INDI drivers. Let me know if that works better.
Thanks!
-- Kevin
Please Log in or Create an account to join the conversation.
- Kevin Ross
-
Topic Author
- Offline
- Elite Member
-
- Posts: 421
- Thank you received: 102
Replied by Kevin Ross on topic INDI focuser driver for Waveshare Stepper Motor HAT for Raspberry Pi
Give it a try, I think you'll like it!
Please Log in or Create an account to join the conversation.