INDI Library v2.0.7 is Released (01 Apr 2024)
Bi-monthly release with minor bug fixes and improvements
Post your INDI Setup!
- Ron Kramer
-

- Offline
- Elite Member
-

Replied by Ron Kramer on topic Post your INDI Setup!
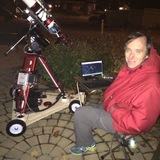
I can be rolled out and shooting in about 5 minutes and if clouds come in I can be rolled back into the garage in 2 minutes.
I tried several cheap dolly options and failed. Mostly due to not rolling in grass or taking bumps well. So I went to this. It's a Bogen tripod dolly. They are 400. (ouch) but they had two
open box units for 200 each. I bought one and shared the find and the other sold fast. I kinda wished I had bought them both for that.
www.amazon.com/gp/product/B0018S9L44/ref..._title?ie=UTF8&psc=1
EXP SCI - ED152cf APO - Celestron 11" RASA - Stellarvue 80mm
Baader F2 HS NB filters, Lodestar X2 guide camera / OAG - ZWO 290mm mini
ZWO ASI1600MM Pro / ASI174M (solar) / ASI094MC
NEXDome, CLoudwatcher, AVX mount/ASIair and Stellarmate
Please Log in or Create an account to join the conversation.

Replied by Joaquin on topic Post your INDI Setup!
I didn’t think on checking this professional video/cine stuff.
Unfortunately I’m in Spain and to the 450 USD cost I have to add 200 USD for the courier and import taxes... (big ouch).
I will check similar devices from European companies...
Anyway, my support is already nearly finished and I must confess that, all together, digital cut of the wooden base, wheels, feet, cnc cut of the feet supports and a few fancy tools I *needed* for the work, I think I have expend more than 450 USD.

I do not have grass or bump problems because I move the telescope through my apartment that is a penthouse with terrace, but I have to negotiate the steep drop of the terrace entrance. For this, I will use a kind of bridge with rails made of aluminium. Not tested yet...
Please Log in or Create an account to join the conversation.

Replied by Jim on topic Post your INDI Setup!
I have not updated much on this thread, but there have been quite a few changes.
Here is the current imaging setup. I have a 12" concrete pier now (begging for a dome), and I have 3D printed custom holders for all the power bricks, focus controller, dew heater, etc. The scope comes in after a session, but the mount just gets covered, keeping the polar align spot on.
Jim
Please Log in or Create an account to join the conversation.
- Ricardo Serpell
-

- Offline
- Junior Member
-

- Posts: 25
- Thank you received: 15
Replied by Ricardo Serpell on topic Post your INDI Setup!
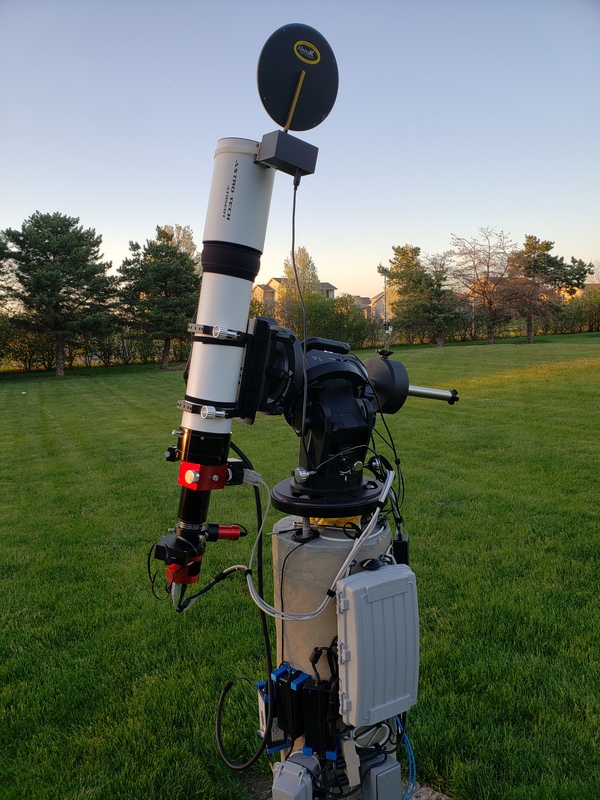
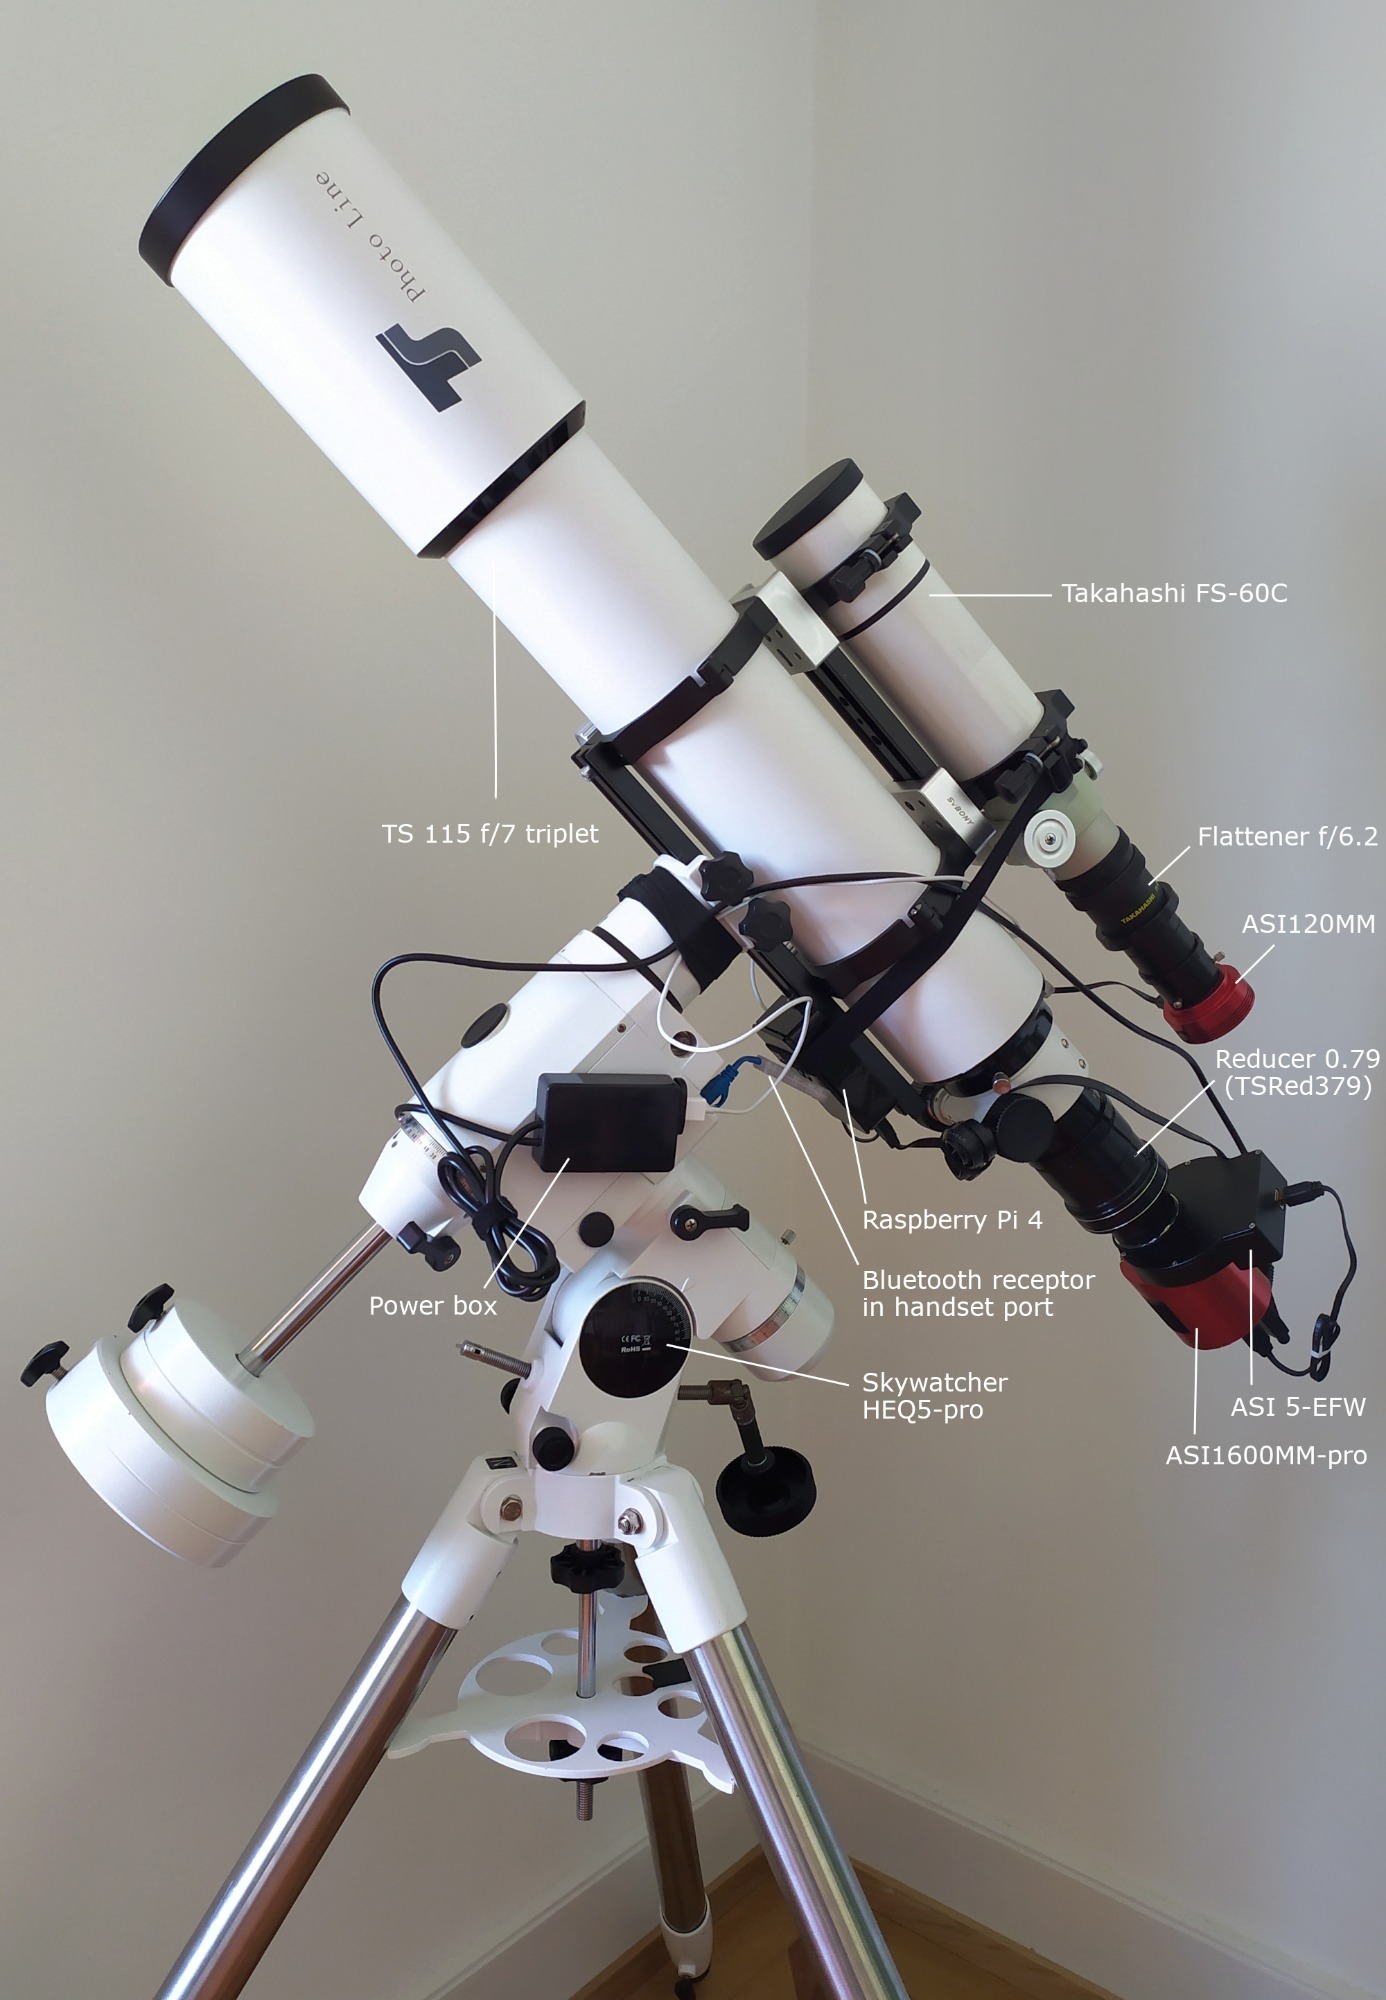
I started trying INDI about a year ago as I was transitioning from unguided to guided exposures. I recently finished putting together the setup shown in these pictures. Currently, it needs to be put together and moved to the balcony every time
I use Astroberry on a Raspberry Pi 4 to control everything remotely. There is a single cable going to the mount from the rest of the world: a 12V power cable, coming from a 12.5A source.
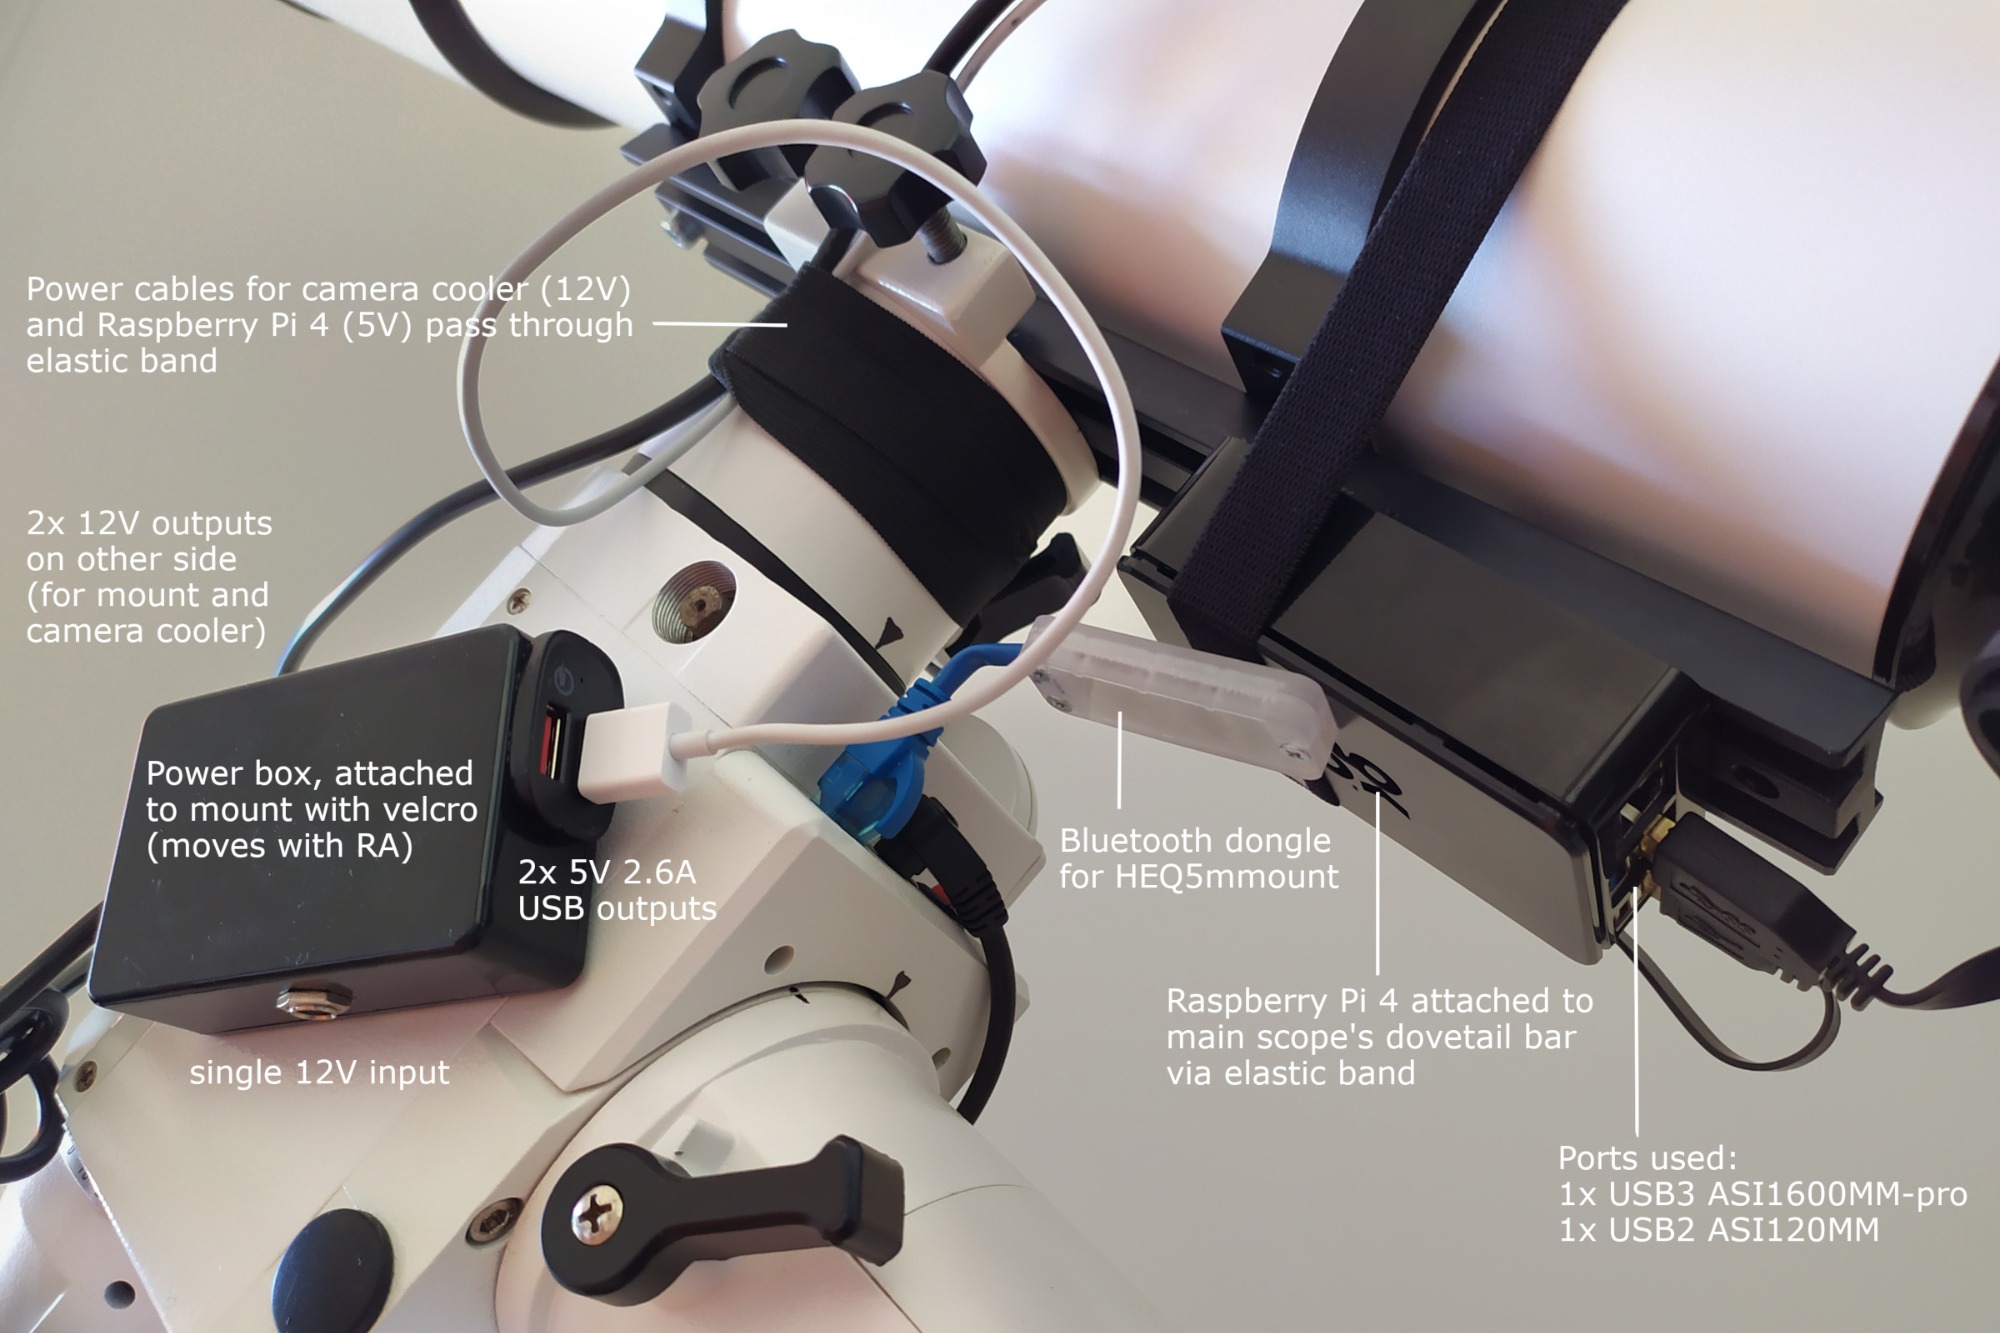
I wanted to have the least number of cables running across moving parts: the raspberry sits on the main telescope and so it moves with it, together with the cameras and the electric filter wheel that are connected to it (well, EFW is in fact connected to the ASI1600MM hub, the ASI120MM not, as I felt it worked better plugged in its own port at the raspberry). The raspberry connects to the mount via Bluetooth.
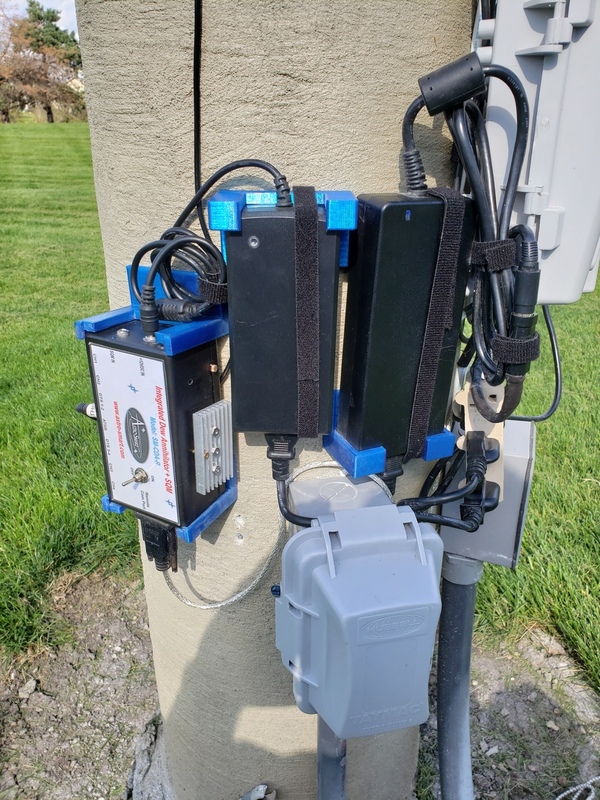
There is a power box (described in a previous post ) attached to the RA arm of the mount. It sources power to the mount and the camera cooler (12V) and to the Raspberry Pi (5V). Power cables to the raspberry and camera cooler run through the declination arm.
It's been a long learning process, but here is the first HaRGB image I have done with this setup: www.astrobin.com/thmb4v/
I'm grateful to all the people in this forum. You all have been a source of invaluable help.
Best regards!
Ricardo
Please Log in or Create an account to join the conversation.

Replied by ouioui01 on topic Post your INDI Setup!
")
Nice setup Ricardo!
Please Log in or Create an account to join the conversation.
- Gilles Gagnon
-
- Offline
- Elite Member
-
- Posts: 294
- Thank you received: 54
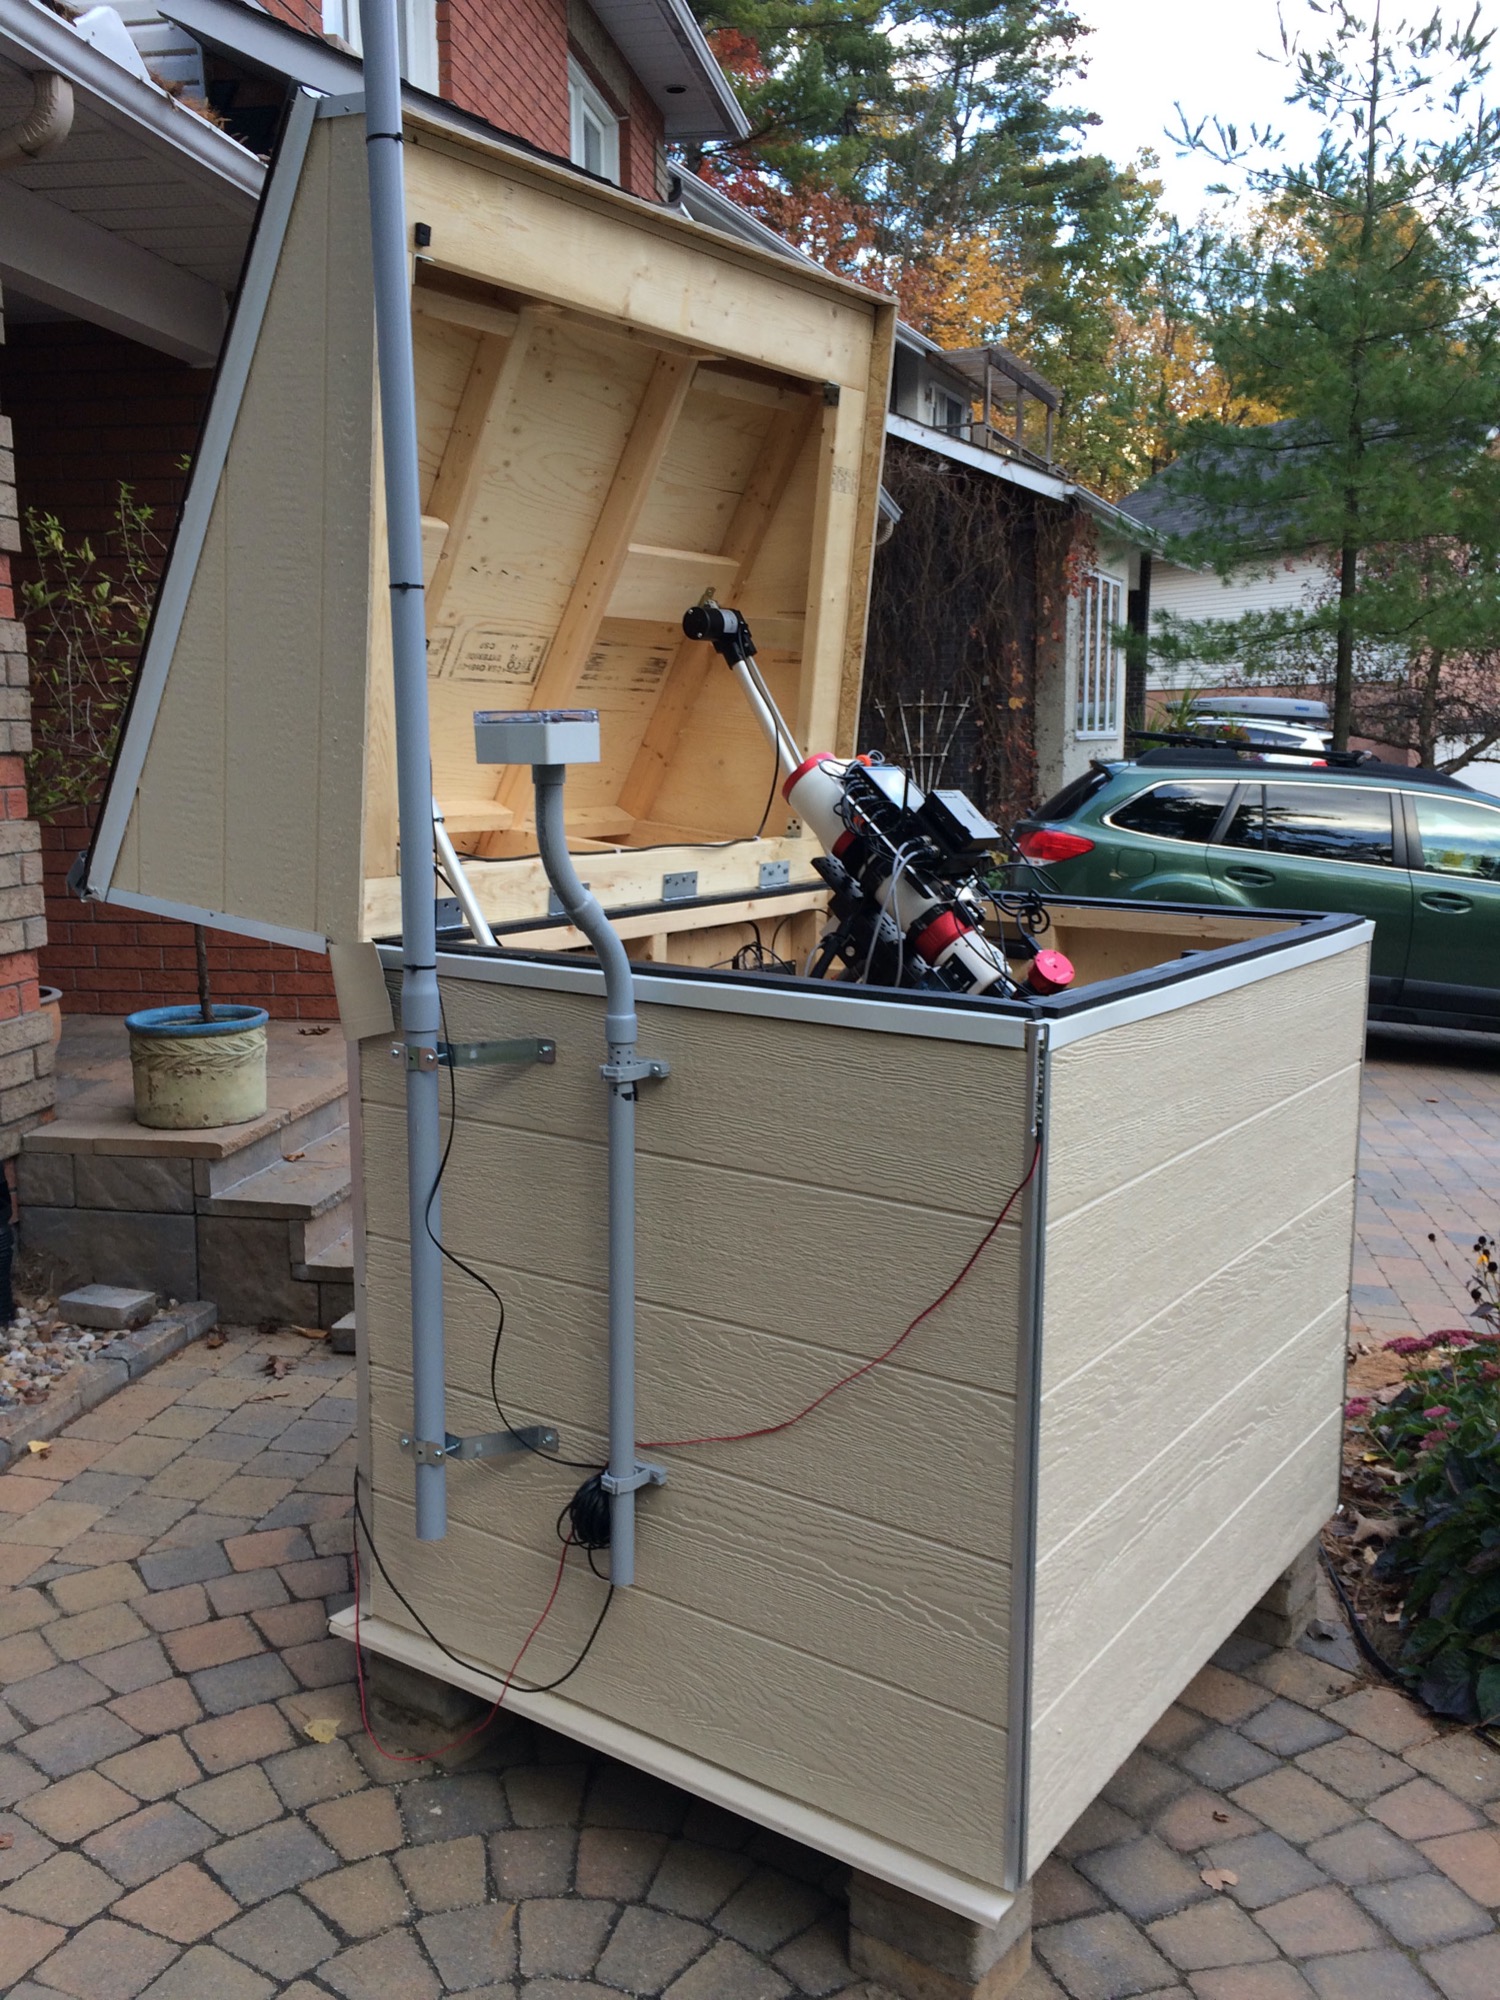
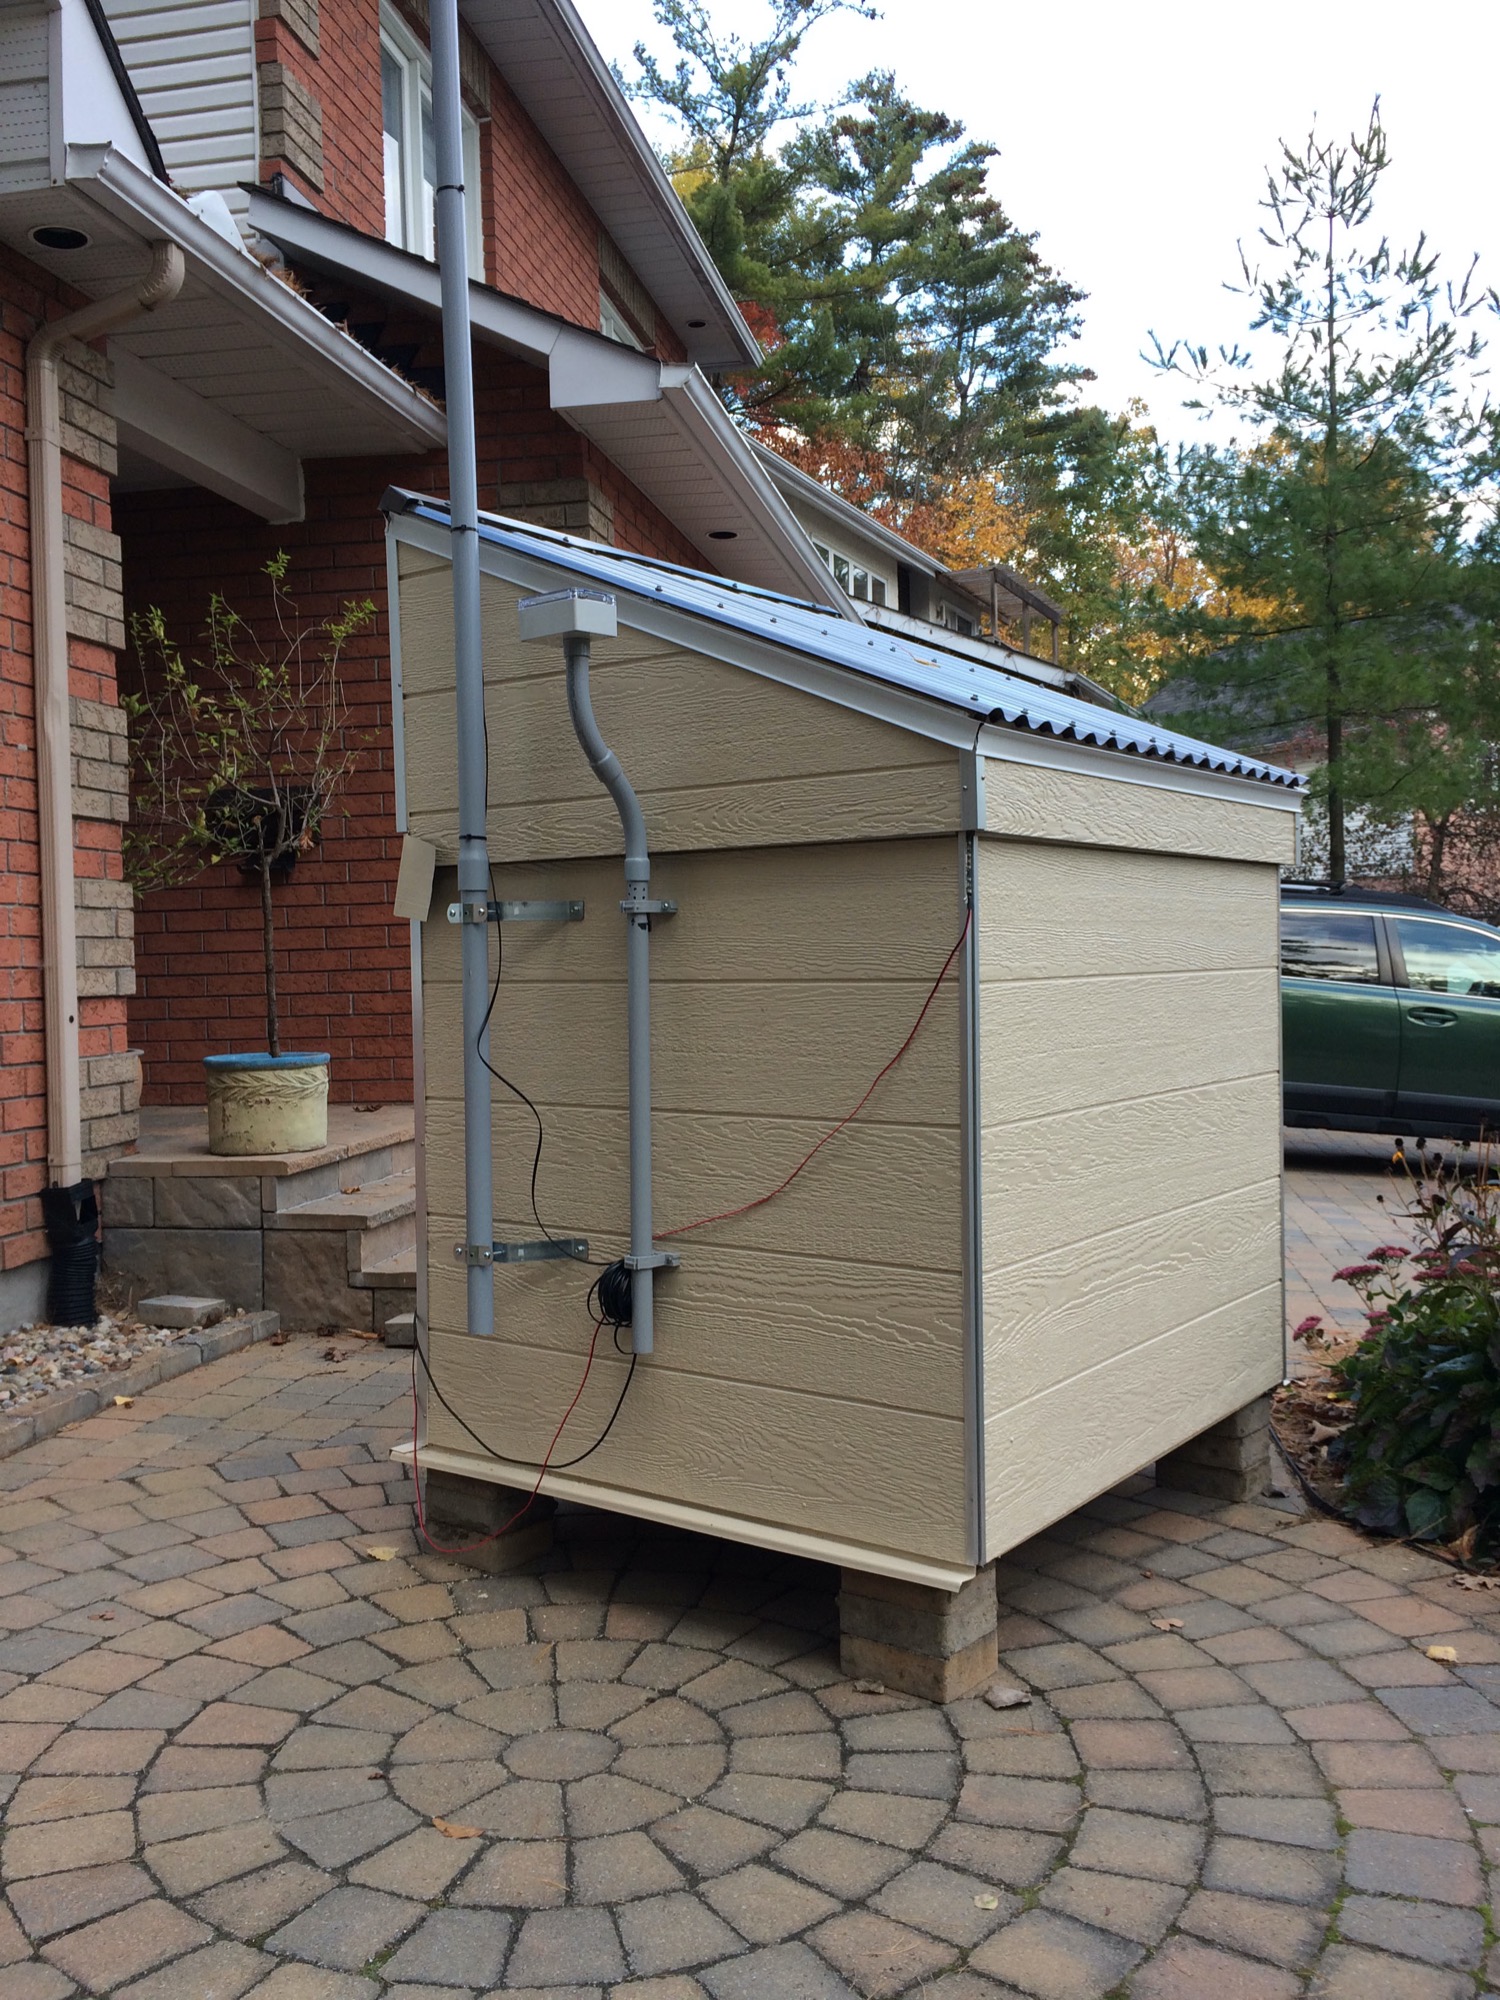
Replied by Gilles Gagnon on topic Post your INDI Setup!
Everything operates under a distributed KStars/Ekos/INDI system on ODroid computers running Ubuntu Mate.
Once the proverbial rainy days go away, I will be able to refine the orientation on the obsy and perform polar alignment and a few tests. Once I am satisfied with the operation and tests, I will likely move it to another area of our lot.
Thanks to the contributors for the KStars/Ekos/INDI environment and to Gonzothegreat for the initial design ideas!
Please Log in or Create an account to join the conversation.
- Andrew Burwell
-
- Offline
- Platinum Member
-

- Posts: 527
- Thank you received: 139
Replied by Andrew Burwell on topic Post your INDI Setup!
Please Log in or Create an account to join the conversation.

Replied by Hans on topic Post your INDI Setup!
Question: I see no ventilation holes, and the edge seems to insulate well. Do you monitor humidity in that box throughout the day ?
Please Log in or Create an account to join the conversation.
- Gonzothegreat
-

- Offline
- Moderator
-

- Posts: 2255
- Thank you received: 223
Replied by Gonzothegreat on topic Post your INDI Setup!
")
Glad to see I've inspired a few out there. If you don't mind I'll give you a few tips that I learned from running my box.
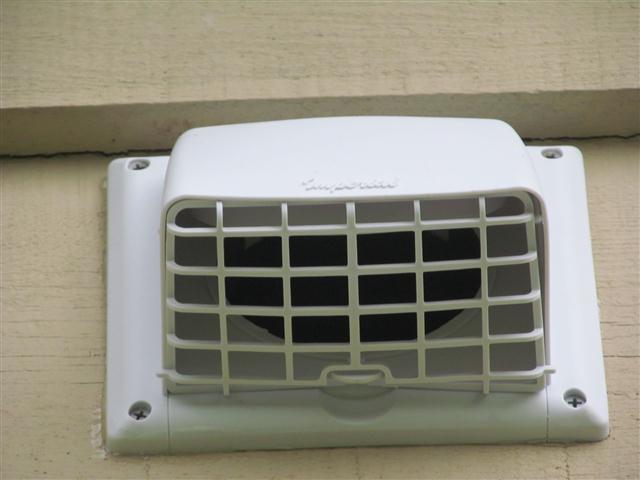
tip #1 and already mentioned by @H__ is about ventilation.
It is VERY important that you add a passive system, take a look at my box, I have a hole at the bottom (well, multiple small holes) covered by a vent plate (and a mesh in between)
then at the top, I have a solar powered fan. If you do not add any ventilation, dew and general humidity will form on anything metallic.
I never had any humidity issues ever in my box with such passive system.
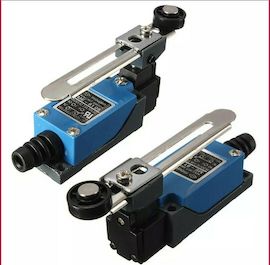
tip #2 limit switches, the ones you are using are very similar to the first ones I had, and they are garbage and tend to fail.
Find on eBay these ones instead.
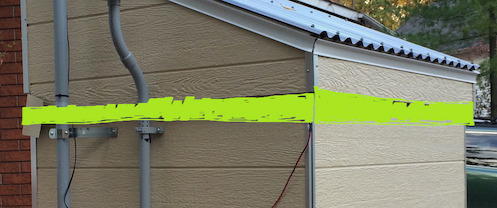
tip #3 I highly recommend that you extend your "roof" over the main box, add an extra plank or half plank.
Believe me, the rain will make its way in...
Please Log in or Create an account to join the conversation.
- Gonzothegreat
-
- Offline
- Moderator
-
- Posts: 2255
- Thank you received: 223
Replied by Gonzothegreat on topic Post your INDI Setup!
On my box, I can remove the side panel even with the roof closed, so in case of a total loss of everything I can still open it.
Please Log in or Create an account to join the conversation.
- Gilles Gagnon
-
- Offline
- Elite Member
-
- Posts: 294
- Thank you received: 54
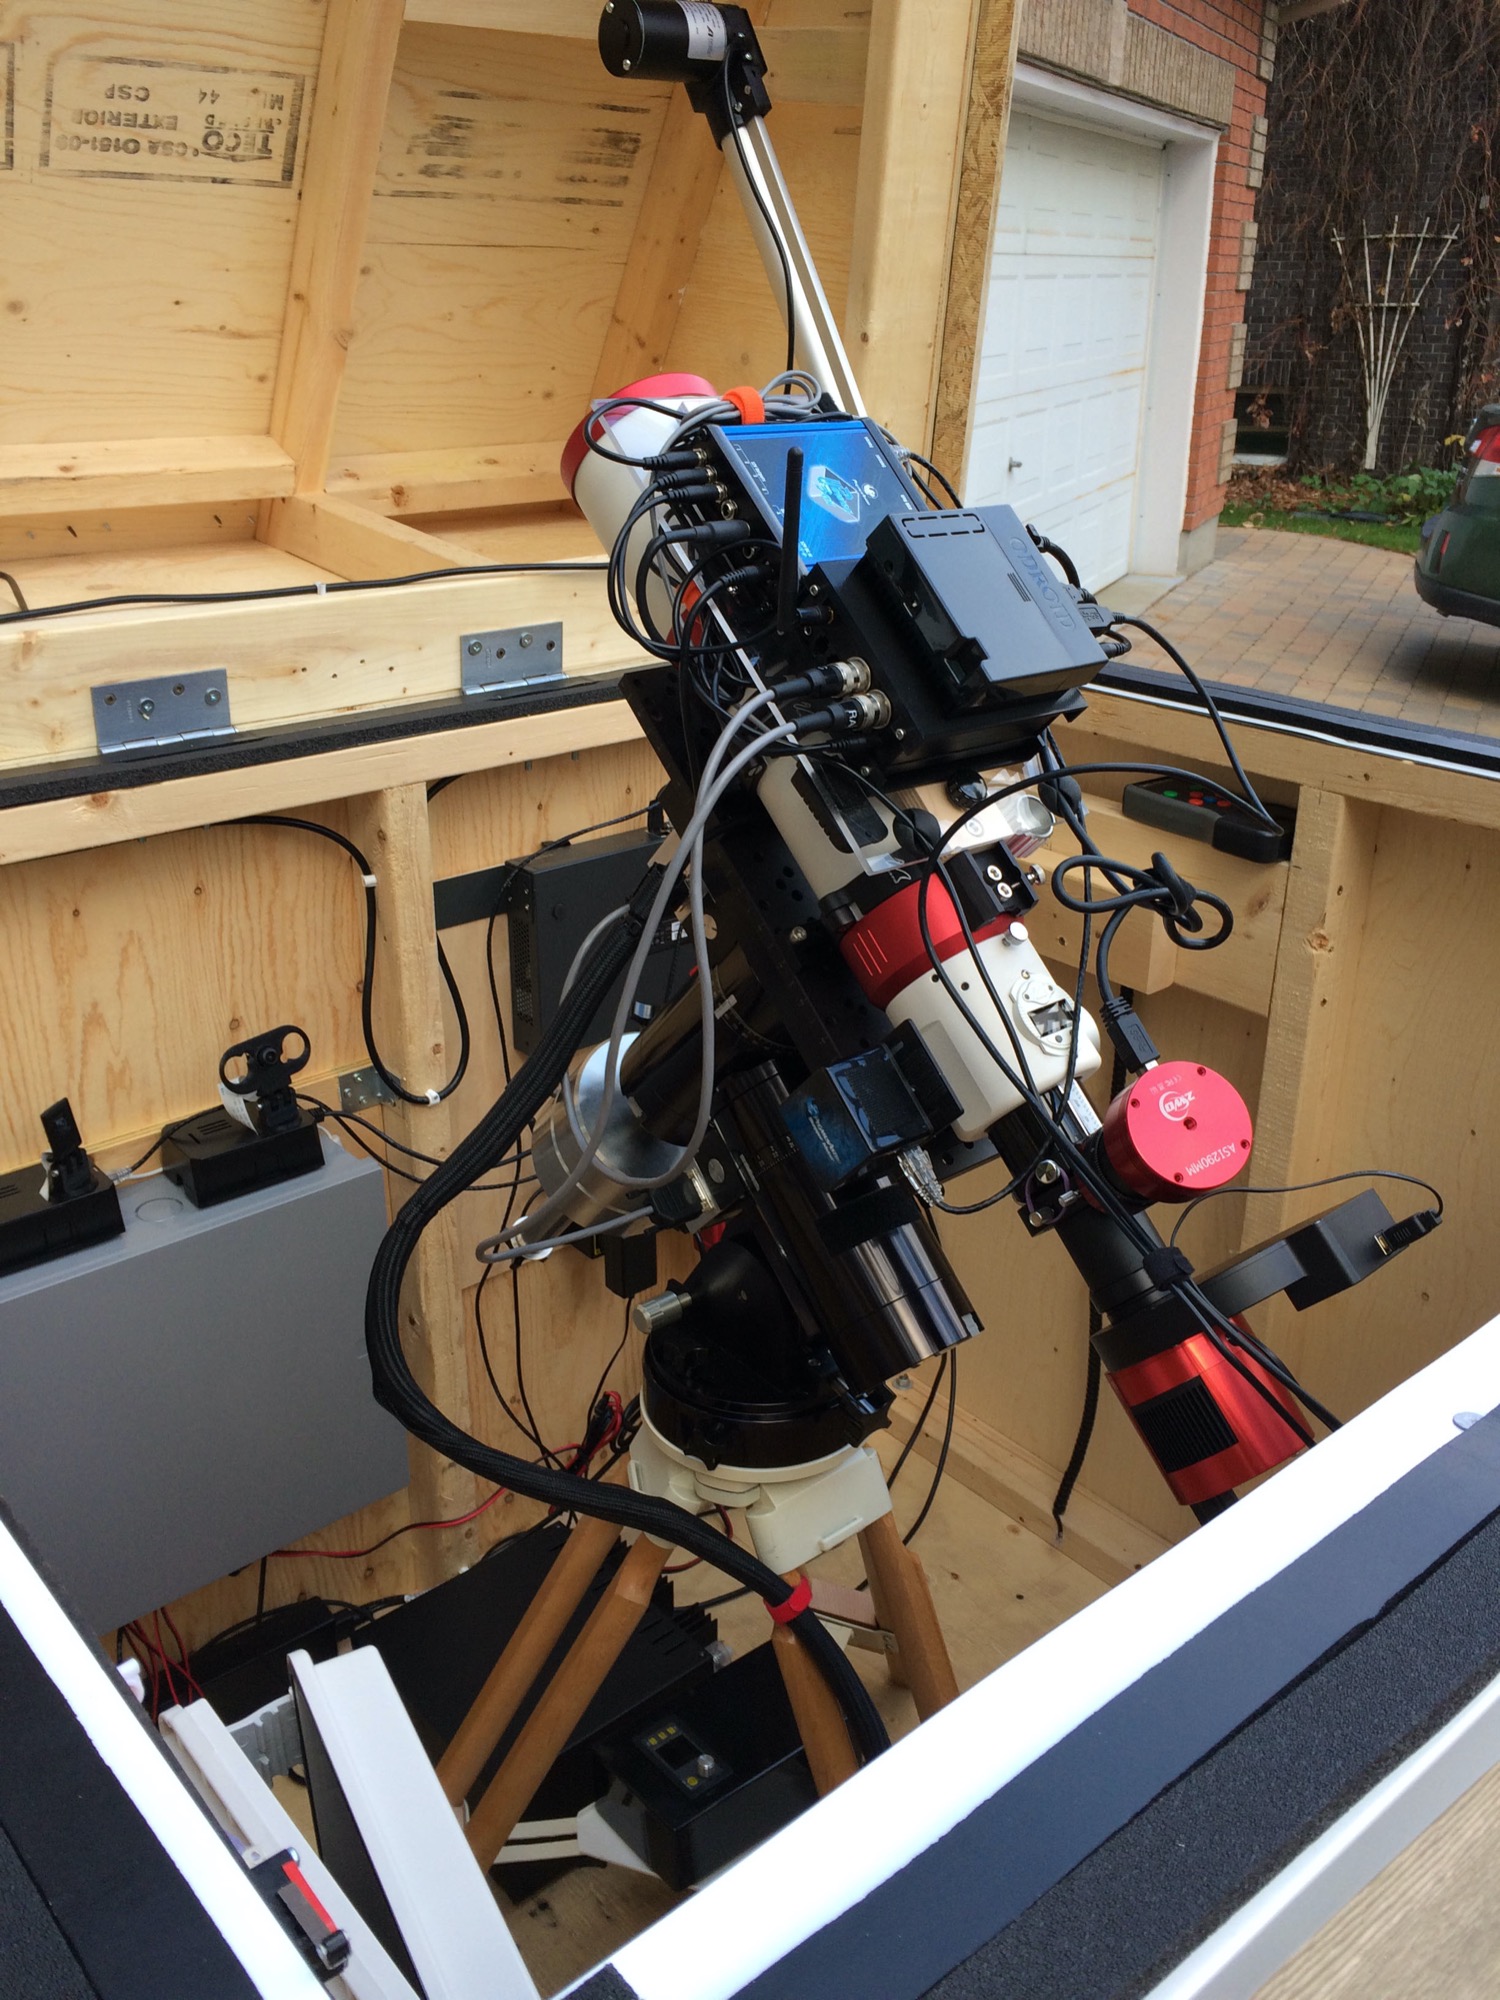
Replied by Gilles Gagnon on topic Post your INDI Setup!
As far as the 'boxes' and control in the observatory, I have a box with power distribution (Powerpole), a Raspi 3 B+ running the observatory (roof relays and limit switches, "Weather Radio" weather station and, once ready, a lightbox for flats). Power is controlled by a Digital Loggers web switch. A PoE network switch provides wired connectivity and monitoring camera connection.
Because of an early mishap, and on my wife's suggestion, I have installed a manual roof control for when I need to work on the obsy as well as a panic button, just in case
") .
.Unless the roof opening system totally fails, I have a battery backup mechanism that feeds the linear actuators in the eventuality of a power failure, controlled by a small wireless remote. I haven't devised a way to get inside yet in case of total failure but I can have access to the linear actuators holding brackets with minimal 'damage' to the roof. I have a nicer solution in mind but I haven't found the hardware for that yet.
I haven't implemented the ventilation yet as I am not sure on how I want to do it. I have thought of something like the following with a fan controlled by an Arduino monitoring temperature and humidity but I'm still juggling with the idea. I also have to consider snow possibly blocking air inlet, in the equation.
Thanks for the tip on the limit switches. I will look into better ones but an alternate solution I thought of is adding redundancy through magnetic sensors such as door open/close sensors, connected in parallel with the switches. The switches are used to confirm full closure or full opening states, not as actuator limits per say.
As far as the extra plank is concerned, there may not be enough space to install one as the gap between roof and wall is rather small I could probably use the same rubber membrane I uses to protect the hinges side of the roof. Not as elegant but this is not a beauty contest.
As far as my equipment, it consists of a William Optics GTF81 scope, mounted on an OnStep modified Astro-Physics AP400 mount, all controlled with an ODroid N2 computer and Pegasus Astro UPB. Cameras are ZWO.
Let me know if you want more details.
Please Log in or Create an account to join the conversation.
- Gilles Gagnon
-
- Offline
- Elite Member
-
- Posts: 294
- Thank you received: 54
Replied by Gilles Gagnon on topic Post your INDI Setup!
Please Log in or Create an account to join the conversation.