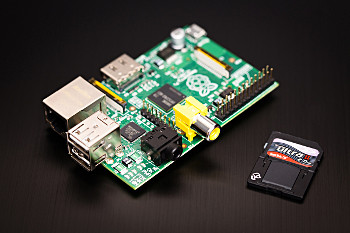
 Raspberry Pi is an ARM based, credit card sized computer. In addition to the usual computer features, it has two GPIO ports with a total number of 21 pins that can be set (on / off) or read. Moreover, one of those pins can be used as a PWM output. Thus, it can be easily connected to sensors, actuators, relays and so on to operate them.
This driver allows to easily control those pins within any INDI enabled software. In this page you will find information about how to install and operate the driver.
Using the Raspberry Pi GPIO INDI for Java Driver
The driver has been developed using the INDI for Java Library. Currently the Raspbian distribution for the Raspberry Pi contains a Java version that is perfectly able to deal with the driver. In addition, the driver makes use of the Pi4J library, but as it is included in the driver package, it is not necessary to install it separately. By the way, all the following commands must be executed on the Raspberry Pi (pretty obvious!)
- Download the INDI for Java Server from the downloads page (I4JServer_vx.xx.zip).
- Unzip it to a directory of your choice:
> unzip I4JServer_vx.xx.zip - Download the INDI for Java Raspberry Pi GPIO Driver from the downloads page (I4JRaspberryPiGPIODriver_vx.xx.zip).
- Unzip it to the same directory:
> unzip I4JRaspberryPiGPIODriver_vx.xx.zip - Launch the INDI for Java Server with the Raspberry Pi GPIO Driver:
> sudo java -jar I4JServer/dist/I4JServer.jar -add=I4JRaspberryPiGPIODriver/dist/I4JRaspberryPiGPIODriver.jar - The server (with the driver) should start working. Check it out with your favourite INDI Client.
Please note that the launching command must be done with sudo as any Java program that controls the GPIO pins should be executed as root.
Autolaunch the Driver at Every Raspberry Pi Boot
If you want the Driver to be loaded every time that your Raspberry Pi boots (may be useful for remote set-ups) you can do it by just appending the following line (in red) to the /etc/rc.local file, just before the exit 0 sentence:
...
# Print the IP address
_IP=$(hostname -I) || true
if [ "$_IP" ]; then
  printf "My IP address is %s\n" "$_IP"
fi

java -jar /completeI4JServerPath/dist/I4JServer.jar -add=/completeI4JRaspberryPiGPIODriverPath/dist/I4JRaspberryPiGPIODriver.jar &

exit 0
NOTE: Due to the fact that the I4JServer expects input from the standard input and that we are launching the processs in background, you will see a NullPointerException when the Raspberry Pi finishes booting. However, the Server and the Driver will perfectly work. You can ignore that message.
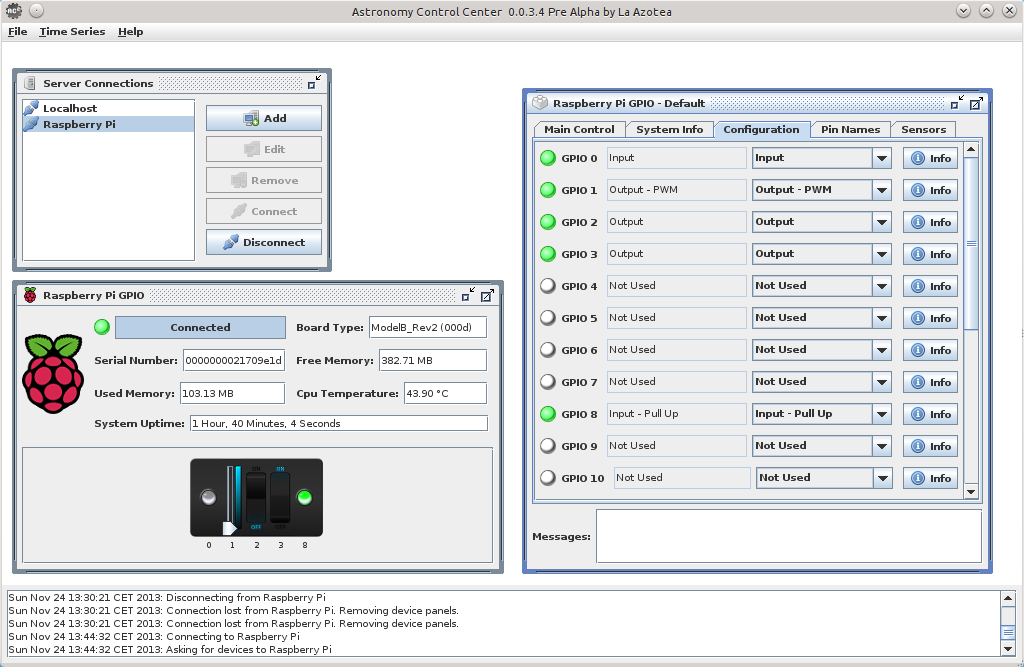
Driver Properties
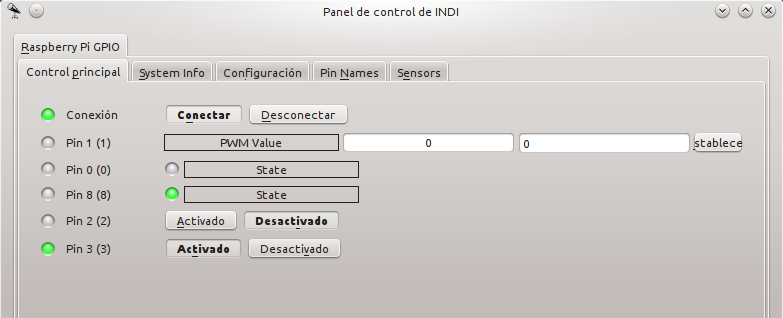
- Main Control Group:
- Connection: Standard connection property.
- GPIO Pin 0 ... GPIO Pin 20: The property to control / view the state of each pin. Will only appear when GPIO x properties are activated.
- Configuration Group:
- GPIO 0 ... GPIO 20: Switches to choose among the different avaliable Input and Output functions for every pin.
- System Info Group:
- Board: Type, revision and serial number of the board.
- Bogo MIPS
- Clock Frequencies: for Arm, Core, DPI, EMMC, H264, HDMI, ISP, Pixel, PWM, Arm, UART, V3D and VEC.
- Codecs: H264, MPG2, WVC1.
- CPU: Processor, features, architecture, voltage...
- Memory Voltages
- Operating System: Name, version, architecture...
- Java: Runtime, version, vendor...
- Sensors Group:
- Memory: Total, free, used, buffers, cached...
- CPU Temperature
- System Uptime: in numerical an text formats. Additional Idle System Uptime.
- Pin Names Group:
- Pin Names: Personalized names for each pin.
Examples of Use